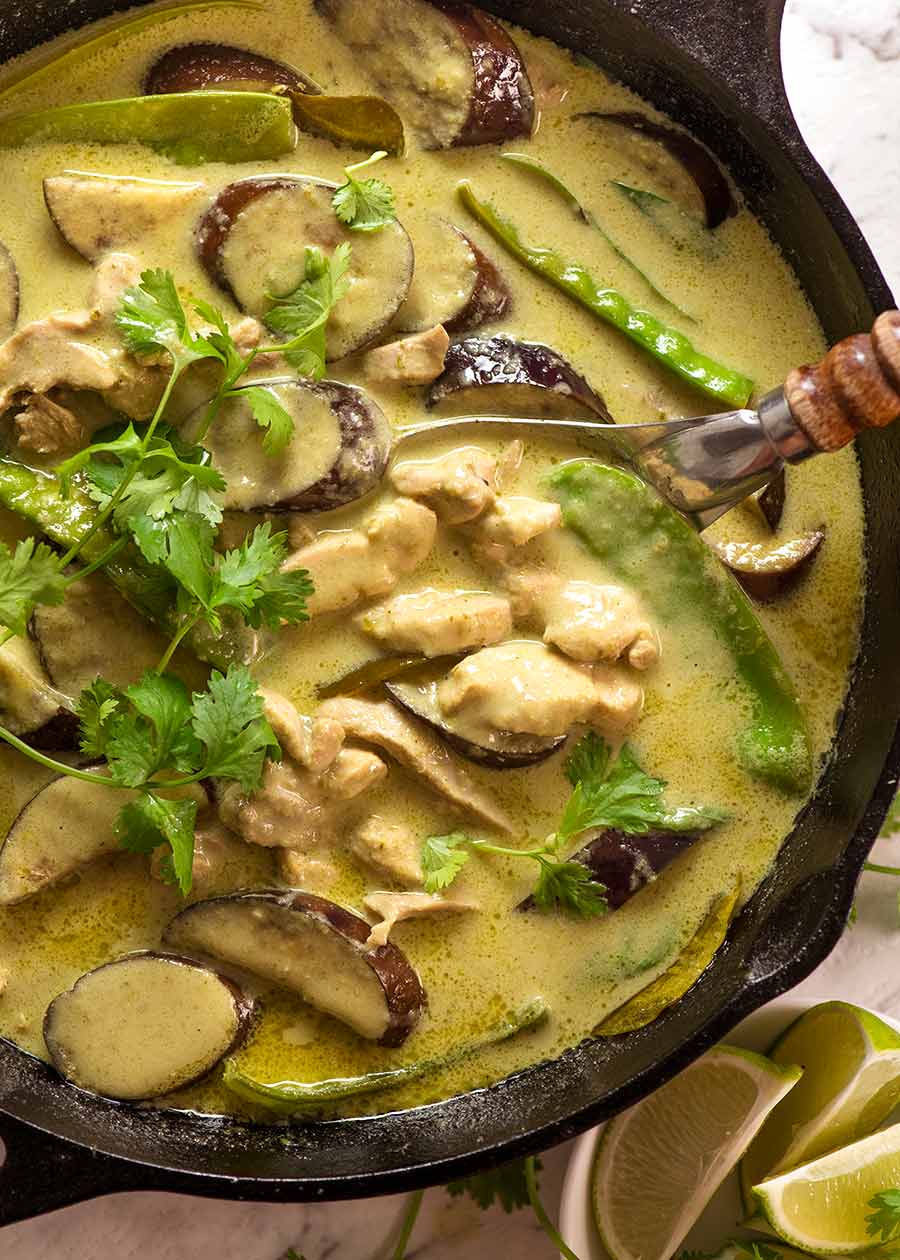
Recipes Vegetarian Pad See Ew

Vegetarian Pad See Ew: A Culinary Journey to Thai Flavors

Pad See Ew, a beloved Thai noodle dish, tantalizes taste buds with its harmonious blend of sweet, savory, and tangy flavors. While traditionally prepared with chicken or beef, this vegetarian rendition offers a delectable alternative, showcasing the versatility and vibrancy of plant-based cuisine.

Ingredients:

For the Noodles:

  • 12 ounces flat rice noodles
  • 4 cups water
  • 1 tablespoon vegetable oil

For the Sauce:

  • 1/4 cup soy sauce
  • 1/4 cup oyster sauce (vegetarian alternative: hoisin sauce)
  • 1/4 cup brown sugar
  • 1/4 cup water
  • 2 tablespoons rice vinegar
  • 1 tablespoon sesame oil
  • 1 teaspoon ground black pepper

For the Vegetables:

  • 1 cup broccoli florets
  • 1 cup carrots, sliced
  • 1 cup bell peppers (any color), sliced
  • 1 cup snow peas
  • 1 onion, sliced
  • 2 cloves garlic, minced
  • 1 inch ginger, minced

For the Garnish:

  • 1/2 cup bean sprouts
  • 1/4 cup chopped peanuts
  • 1/4 cup chopped cilantro
  • Lime wedges, for serving

Instructions:

Prepare the Noodles:

  1. In a large pot, bring the water to a boil.
  2. Add the rice noodles and cook according to the package directions, usually 5-7 minutes.
  3. Drain the noodles and rinse them under cold water to prevent sticking.
  4. Toss the noodles with the vegetable oil to prevent clumping.

Make the Sauce:

  1. In a small bowl, whisk together the soy sauce, oyster sauce (or hoisin sauce), brown sugar, water, rice vinegar, sesame oil, and black pepper.
  2. Set aside until ready to use.

Sauté the Vegetables:

  1. In a large skillet or wok over medium heat, heat a drizzle of vegetable oil.
  2. Add the onion, garlic, and ginger and cook until fragrant, about 1 minute.
  3. Add the broccoli, carrots, bell peppers, and snow peas and cook until tender-crisp, about 5-7 minutes.

Combine the Noodles and Sauce:

  1. Add the cooked noodles to the skillet with the vegetables.
  2. Pour in the prepared sauce and toss to coat the noodles evenly.
  3. Cook for 2-3 minutes, or until the sauce has thickened and the noodles are heated through.

Garnish and Serve:

  1. Transfer the Pad See Ew to a serving dish.
  2. Top with bean sprouts, peanuts, and cilantro.
  3. Serve immediately with lime wedges for squeezing over the dish.

Tips:

  • For a spicier dish, add a pinch of red pepper flakes to the sauce.
  • If you don’t have rice vinegar, you can substitute white vinegar or apple cider vinegar.
  • To make the dish vegan, use a vegan oyster sauce alternative, such as hoisin sauce or a mixture of soy sauce and mushroom sauce.
  • Pad See Ew is best served fresh, but it can be stored in the refrigerator for up to 3 days. Reheat it over medium heat in a skillet or microwave until warmed through.

Nutritional Value:

A serving of Vegetarian Pad See Ew (1 cup) provides approximately:

  • Calories: 350
  • Carbohydrates: 60 grams
  • Protein: 15 grams
  • Fat: 10 grams
  • Fiber: 5 grams
  • Iron: 2 milligrams
  • Vitamin C: 20 milligrams

Conclusion:

Vegetarian Pad See Ew is a delectable and nutritious dish that captures the essence of Thai cuisine. Its vibrant flavors, tender vegetables, and chewy noodles make it a satisfying meal that will tantalize your taste buds. Whether you’re a seasoned vegetarian or simply looking to expand your culinary horizons, this recipe is a must-try. So gather your ingredients, fire up the stove, and embark on a culinary adventure that will leave you craving for more.

Share:

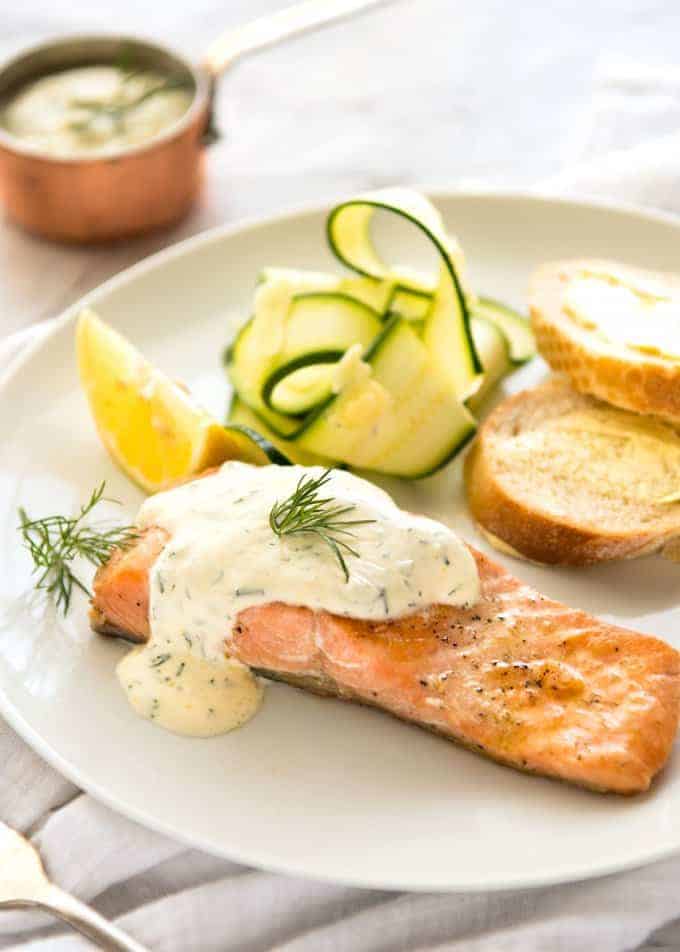
Sauce Sophistication: Creamy Dill Sauce For Salmon Or Trout Delights

Sauce Sophistication: Creamy Dill Sauce For Salmon Or Trout Delights

Creamy Dill Sauce For Salmon Or Trout Delights

A Simple Yet Exquisite Sauce to Elevate Your Fish Entrees

Prep Time: 5 minutes
Cook Time: 10 minutes
Total Time: 15 minutes
Yields: 1 cup of sauce

Ingredients:

– ½ cup mayonnaise
– ⅓ cup sour cream
– 1 garlic clove, minced
– Salt and pepper, to taste

Instructions:

  1. In a medium bowl, whisk together mayonnaise and sour cream until well combined.
  2. Whisk until all the ingredients are well incorporated and the sauce is smooth and creamy.
  3. Cover the bowl with plastic wrap and refrigerate for at least 30 minutes to allow the flavors to meld.

Variations:

– For a slightly smoky flavor, add a pinch of smoked paprika to the sauce.

Serving Suggestions:

– This creamy dill sauce is perfect for grilled, baked, or pan-fried salmon or trout.
– Serve it alongside boiled or roasted vegetables for a light and healthy meal.

Storage:

– The sauce may thicken as it cools, so thin it with a little bit of milk or water when ready to use.
1. Versatility: The creamy dill sauce is not limited to salmon or trout. It can also be paired with other fish dishes, such as cod, halibut, or tilapia. The sauce’s creamy texture and dill flavor complement various fish flavors, making it a versatile condiment for seafood meals.

Share:

Chocoholic's Paradise Continues: Delight In Chocolate Custard Cake

Chocoholic's Paradise Continues: Delight In Chocolate Custard Cake

Ingredients:

For the Cake:

– 1 1/2 cups all-purpose flour
– 1/2 cup unsweetened cocoa powder
– 1 cup granulated sugar
– 1/2 cup packed light brown sugar
– 1/2 cup vegetable oil
– 2 large eggs

– 4 cups milk
– 1 1/2 cups granulated sugar
– 1/2 cup unsweetened cocoa powder
– 1/4 cup cornstarch
– 1/4 cup all-purpose flour
– 2 large eggs, beaten

Instructions:

1. Preheat oven to 350°F (175°C). Grease and flour a 9×13 inch baking pan.

2. Prepare the Cake:

– In a medium bowl, whisk together the flour, cocoa powder, baking powder, baking soda, and salt.

– In a large saucepan, whisk together the milk, granulated sugar, cocoa powder, and salt. Bring to a simmer over medium heat, stirring constantly.

Additional Notes:

Share:

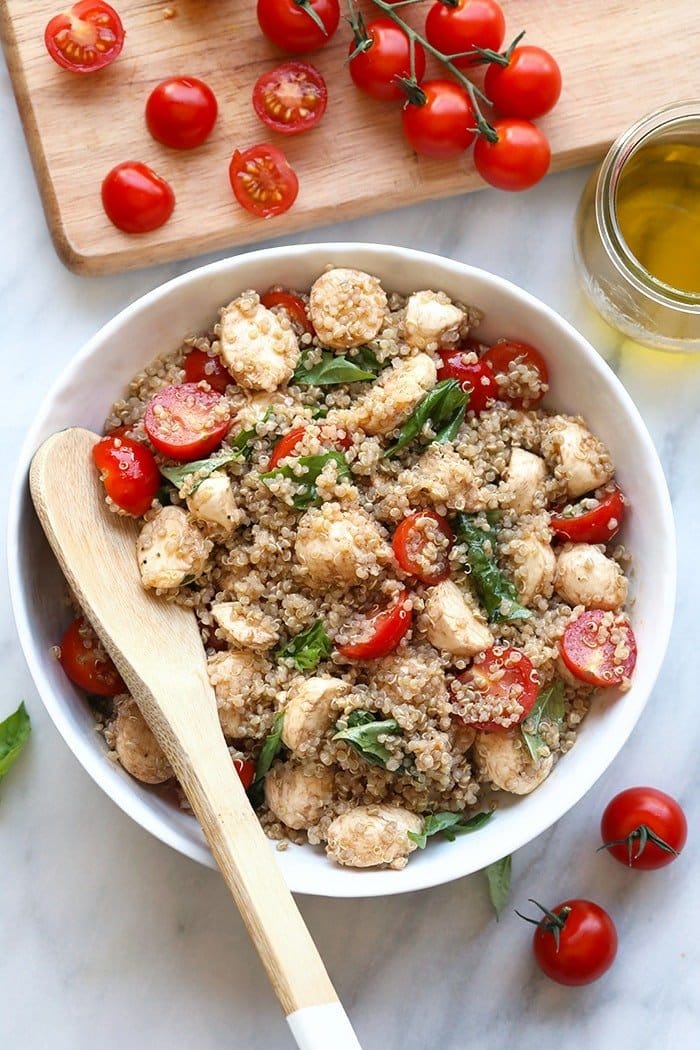
Recipes Caprese Quinoa Salad

Caprese Quinoa Salad: A Refreshing and Flavorful Summer Dish

Caprese salad, a classic Italian appetizer, is a simple yet delicious combination of fresh tomatoes, mozzarella cheese, and basil. This recipe takes the flavors of Caprese salad and transforms them into a refreshing and flavorful summer salad.

Ingredients:

  • 1 cup uncooked white or red Quinoa
  • 1 1/2 cups water or vegetable broth
  • 1/2 cup chopped fresh basil
  • 1 cup chopped fresh tomatoes
  • 1 cup chopped fresh mozzarella cheese
  • 1/4 cup chopped red onion
  • 1/4 cup olive oil
  • 2 tablespoons red wine vinegar
  • 1 teaspoon dried oregano
  • 1/2 teaspoon salt
  • 1/4 teaspoon black pepper

Instructions:

  1. Rinse the Quinoa in a fine-mesh sieve until the water runs clear.
  2. In a medium-sized pot, combine the Quinoa, water or vegetable broth, and salt. Bring to a boil over high heat.
  3. Reduce heat to low, cover, and simmer for 15-18 minutes, or until the Quinoa is cooked through and the liquid has been absorbed.
  4. While the Quinoa is cooking, prepare the rest of the salad ingredients. Chop the basil, tomatoes, mozzarella cheese, and red onion.
  5. In a large bowl, combine the cooked Quinoa, basil, tomatoes, mozzarella cheese, red onion, olive oil, red wine vinegar, oregano, salt, and black pepper. Stir gently to combine.
  6. Serve immediately or refrigerate for later.

Tips:

  • For a more flavorful salad, use ripe, in-season tomatoes.
  • If you don’t have fresh mozzarella cheese, you can use shredded mozzarella or bocconcini.
  • Add other vegetables to the salad, such as chopped cucumbers, bell peppers, or olives.
  • For a vegetarian or vegan version of the salad, omit the mozzarella cheese.
  • Serve the salad with a side of crusty bread or crackers for dipping.

Variations:

  • Mediterranean Quinoa Salad: Add chopped Kalamata olives, feta cheese, and a sprinkle of dried thyme to the salad.
  • Greek Quinoa Salad: Add chopped cucumbers, red onion, feta cheese, and a drizzle of lemon juice to the salad.
  • Spicy Quinoa Salad: Add chopped jalapeño peppers or cayenne pepper to the salad for a kick of heat.
  • Sweet and Savory Quinoa Salad: Add chopped dried apricots, raisins, or nuts to the salad for a touch of sweetness.

Nutritional Information:

Caprese Quinoa Salad is a healthy and satisfying dish that is packed with nutrients. One serving contains approximately:

  • Calories: 300
  • Fat: 10 grams
  • Protein: 15 grams
  • Fiber: 5 grams
  • Net carbohydrates: 40 grams

Conclusion:

Caprese Quinoa Salad is a delicious and refreshing summer salad that is easy to make and can be customized to your liking. It’s a perfect dish for picnics, potlucks, or as a light and healthy meal. Enjoy the vibrant flavors of Caprese in this flavorful and satisfying salad.

Share:

Recipes Caprese Pasta Salad

Caprese Pasta Salad: A Refreshing Summertime Delight

Indulge in the vibrant flavors of summer with this tantalizing Caprese Pasta Salad. Inspired by the classic Italian salad, this dish combines fresh tomatoes, creamy mozzarella, fragrant basil, and tender pasta in a symphony of taste. Perfect for picnics, potlucks, or light summer meals, this refreshing salad is sure to impress.

Ingredients:

  • 1 pound (450 grams) short pasta, such as penne, rotini, or fusilli
  • 1 pound (450 grams) ripe tomatoes, diced
  • 1 pound (450 grams) fresh mozzarella balls, cut into bite-sized pieces
  • 1 cup (240 milliliters) fresh basil leaves, chopped
  • 1/2 cup (120 milliliters) extra virgin olive oil
  • 1/4 cup (60 milliliters) balsamic vinegar
  • 1 teaspoon (5 grams) dried oregano
  • 1/2 teaspoon (2.5 grams) salt
  • 1/4 teaspoon (1.25 grams) black pepper
  • Optional: 1/2 cup (120 grams) kalamata olives, sliced

Instructions:

  1. Cook the Pasta: Bring a large pot of salted water to a boil. Add the pasta and cook according to the package directions until al dente (slightly firm to the bite). Drain the pasta and rinse it with cold water to stop the cooking process.

  2. Prepare the Vegetables: While the pasta is cooking, prepare the tomatoes and mozzarella. Dice the tomatoes into small, bite-sized pieces. Cut the mozzarella balls into similar-sized pieces.

  3. Make the Dressing: In a small bowl, whisk together the olive oil, balsamic vinegar, oregano, salt, and pepper. Taste and adjust the seasonings as needed.

  4. Combine the Salad: In a large bowl, combine the cooked pasta, tomatoes, mozzarella, basil, and olives (if using). Pour the dressing over the salad and toss to coat.

  5. Chill and Serve: Refrigerate the salad for at least 30 minutes before serving. This will allow the flavors to meld and the pasta to absorb the dressing. Serve chilled as a refreshing side dish or main course.

Tips:

  • For the best flavor, use ripe, in-season tomatoes.
  • If you can’t find fresh mozzarella, you can substitute with a good-quality buffalo mozzarella.
  • Add a drizzle of honey or a pinch of sugar to the dressing for a touch of sweetness.
  • For a vegetarian version, omit the olives.
  • To make a gluten-free version, use gluten-free pasta.

Variations:

  • Grilled Caprese Pasta Salad: Grill the tomatoes and mozzarella before adding them to the salad for a smoky flavor.
  • Caprese Pasta Salad with Pesto: Add a few spoonfuls of pesto to the dressing for an extra burst of basil flavor.
  • Caprese Pasta Salad with Arugula: Add a handful of fresh arugula to the salad for a peppery bite.
  • Caprese Pasta Salad with Roasted Vegetables: Roast some vegetables, such as bell peppers, zucchini, or eggplant, and add them to the salad for a colorful and flavorful twist.

Serving Suggestions:

  • Serve Caprese Pasta Salad as a side dish with grilled chicken, fish, or steak.
  • Pack it in a lunchbox for a refreshing and satisfying meal on the go.
  • Enjoy it as a light main course on a warm summer evening.

Nutritional Information:

One serving (about 1 cup) of Caprese Pasta Salad contains approximately:

  • Calories: 350
  • Fat: 15 grams
  • Protein: 15 grams
  • Carbohydrates: 45 grams
  • Fiber: 5 grams

Conclusion:

Caprese Pasta Salad is a vibrant and refreshing dish that captures the essence of summer. With its combination of fresh tomatoes, creamy mozzarella, fragrant basil, and tender pasta, this salad is a delightful treat for any occasion. Whether you’re hosting a picnic, attending a potluck, or simply looking for a light and flavorful meal, Caprese Pasta Salad is sure to impress. So gather your ingredients, fire up the grill, and prepare to indulge in this summery delight.

Share:

Recipes Teriyaki Glazed Veggie Stir-Fry

Teriyaki Glazed Veggie Stir-Fry: A Symphony of Flavors

Stir-fries are a quick, easy, and versatile way to enjoy a healthy and flavorful meal. This Teriyaki Glazed Veggie Stir-Fry is no exception, featuring a vibrant medley of vegetables coated in a delectable teriyaki glaze. With its tantalizing aroma and irresistible taste, this dish will become a staple in your weekly meal rotation.

Ingredients:

For the Teriyaki Glaze:

  • 1/4 cup soy sauce
  • 1/4 cup mirin (sweet Japanese rice wine)
  • 1/4 cup sake (Japanese rice wine)
  • 1/4 cup brown sugar
  • 1 tablespoon cornstarch
  • 1 tablespoon water

For the Stir-Fry:

  • 1 tablespoon vegetable oil
  • 1 onion, thinly sliced
  • 1 red bell pepper, thinly sliced
  • 1 green bell pepper, thinly sliced
  • 1 cup broccoli florets
  • 1 cup snap peas, trimmed
  • 1 cup carrots, thinly sliced
  • 1/2 cup baby corn, halved
  • 1/2 cup water chestnuts, sliced
  • 1/4 cup chopped fresh cilantro

Instructions:

To Make the Teriyaki Glaze:

  1. In a small saucepan, whisk together the soy sauce, mirin, sake, brown sugar, cornstarch, and water.
  2. Bring to a simmer over medium heat, stirring constantly.
  3. Reduce heat to low and simmer for 5-7 minutes, or until the glaze has thickened.

To Make the Stir-Fry:

  1. Heat the vegetable oil in a large skillet or wok over medium-high heat.
  2. Add the onion and cook for 2-3 minutes, or until softened.
  3. Add the bell peppers, broccoli, snap peas, carrots, baby corn, and water chestnuts. Cook for 5-7 minutes, or until the vegetables are tender-crisp.
  4. Pour the teriyaki glaze over the vegetables and stir to coat.
  5. Cook for an additional 2-3 minutes, or until the glaze has caramelized and the vegetables are heated through.
  6. Remove from heat and stir in the cilantro.

Serving Suggestions:

Serve the Teriyaki Glazed Veggie Stir-Fry immediately over rice, noodles, or quinoa. You can also enjoy it as a side dish or as a vegetarian main course.

Variations:

  • Add protein: Stir in cooked chicken, beef, pork, or tofu for a protein-packed meal.
  • Use different vegetables: Feel free to substitute or add your favorite vegetables, such as zucchini, mushrooms, or asparagus.
  • Adjust the sweetness: If you prefer a sweeter glaze, add an extra tablespoon of brown sugar. Conversely, if you want a less sweet glaze, reduce the brown sugar by a tablespoon.
  • Make it spicy: Add a pinch of red pepper flakes or Sriracha sauce to the glaze for a spicy kick.

Nutritional Benefits:

This Teriyaki Glazed Veggie Stir-Fry is not only delicious but also packed with nutrients. The vegetables provide essential vitamins, minerals, and antioxidants, while the teriyaki glaze adds a touch of sweetness and umami. Here’s a breakdown of the nutritional benefits:

  • Vegetables: The variety of vegetables used in this stir-fry provides a wide range of nutrients, including vitamin A, vitamin C, potassium, and fiber.
  • Teriyaki glaze: The teriyaki glaze is made with soy sauce, which is a good source of protein and iron. The brown sugar adds a touch of sweetness and provides energy.

Tips:

  • For the best flavor, use fresh vegetables.
  • Cut the vegetables into uniform sizes so they cook evenly.
  • Don’t overcrowd the pan or wok when cooking the vegetables. Cook them in batches if necessary.
  • Stir-fry the vegetables over high heat to ensure they retain their crispness.
  • If the glaze becomes too thick, add a splash of water or vegetable broth.
  • Serve the stir-fry immediately for the best flavor and texture.

Conclusion:

This Teriyaki Glazed Veggie Stir-Fry is a culinary masterpiece that combines vibrant flavors and wholesome ingredients. It’s a quick and easy meal that’s perfect for busy weeknights or as a healthy side dish. With its versatility and nutritional benefits, this stir-fry is sure to become a favorite in your household. So gather your ingredients, fire up the stove, and embark on a culinary journey that will tantalize your taste buds and nourish your body.

Share:

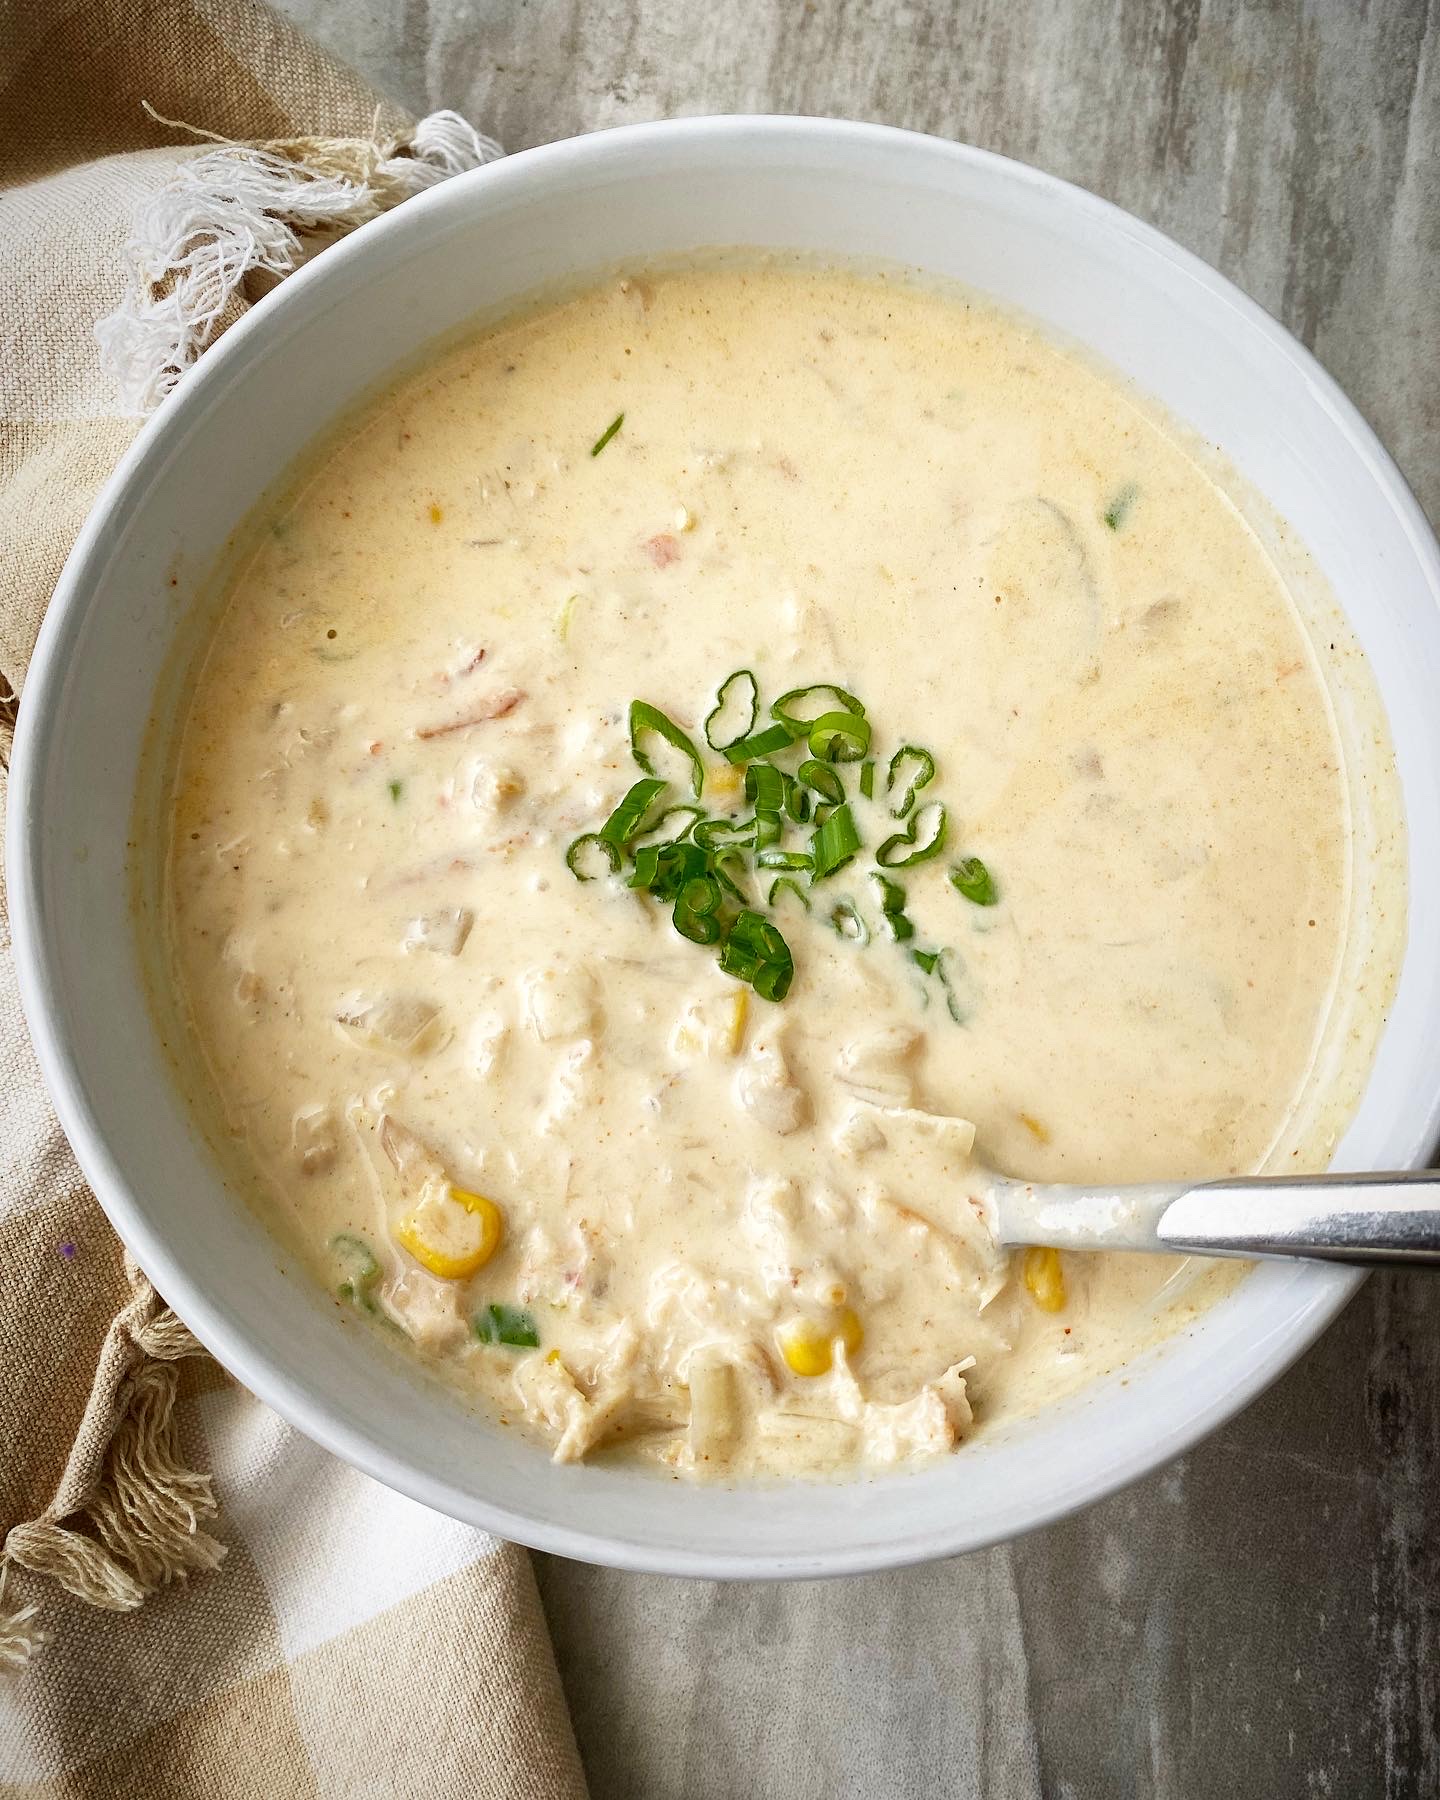
Recipes Cajun Corn And Crab Bisque

Cajun Corn and Crab Bisque: A Symphony of Flavors from the Bayou

Indulge in the tantalizing flavors of Cajun cuisine with this delectable recipe for Corn and Crab Bisque. Originating from the vibrant heart of Louisiana, this creamy and aromatic soup embodies the essence of the bayou’s culinary heritage. Prepare to embark on a culinary journey that will tantalize your taste buds and leave you craving for more.

Ingredients:

For the Bisque Base:

  • 1/2 cup (1 stick) unsalted butter
  • 1/2 cup all-purpose flour
  • 4 cups chicken broth
  • 4 cups vegetable broth
  • 1 large yellow onion, chopped
  • 2 celery stalks, chopped
  • 2 green bell peppers, chopped
  • 4 cloves garlic, minced
  • 1 teaspoon dried thyme
  • 1 teaspoon dried oregano
  • 1/2 teaspoon cayenne pepper
  • 1/4 teaspoon black pepper
  • 1 bay leaf
  • 1 cup heavy cream

For the Corn and Crab:

  • 2 ears of fresh corn, kernels removed
  • 1 pound lump crab meat, picked over for shells
  • 1/2 cup chopped green onions
  • 1/4 cup chopped fresh parsley
  • 1 tablespoon lemon juice
  • Salt and black pepper to taste

Instructions:

Making the Bisque Base:

  1. In a large Dutch oven or stockpot over medium heat, melt the butter.
  2. Whisk in the flour and cook for 1 minute, or until the roux is golden brown.
  3. Gradually whisk in the chicken broth and vegetable broth until smooth.
  4. Add the onion, celery, bell peppers, garlic, thyme, oregano, cayenne pepper, black pepper, and bay leaf.
  5. Bring to a boil, then reduce heat and simmer for 30 minutes, or until the vegetables are tender.
  6. Stir in the heavy cream and bring to a simmer.

Adding the Corn and Crab:

  1. Add the corn kernels, crab meat, green onions, parsley, and lemon juice to the bisque base.
  2. Season with salt and black pepper to taste.
  3. Simmer for an additional 10 minutes, or until the crab is heated through.

Serving Suggestions:

  • Ladle the bisque into warm bowls and garnish with additional green onions, parsley, or a dollop of sour cream.
  • Serve with crusty bread or crackers for dipping.
  • Pair with a crisp white wine or a cold beer for a complete dining experience.

Variations:

  • Seafood Medley: Add other seafood to the bisque, such as shrimp, scallops, or mussels.
  • Spicy Kick: Increase the amount of cayenne pepper for a more pronounced heat.
  • Creamy Comfort: Add an extra 1/2 cup of heavy cream for a richer and more decadent bisque.
  • Vegetarian Delight: Omit the crab meat and add more vegetables, such as diced carrots or potatoes.

Tips for Success:

  • Use Fresh Ingredients: The freshness of the corn and crab will significantly enhance the flavor of the bisque.
  • Make Your Own Roux: While pre-made roux is available, making your own ensures a richer and more flavorful base.
  • Simmer Slowly: Allow the bisque to simmer gently to develop its full flavor and prevent burning.
  • Season to Taste: Taste the bisque throughout the cooking process and adjust the seasonings as needed.

The Essence of Cajun Cuisine:

Cajun Corn and Crab Bisque embodies the vibrant and flavorful spirit of Cajun cuisine. Its rich and creamy base, infused with the aromatic trinity of onion, celery, and bell peppers, captures the essence of the bayou’s culinary heritage. The addition of sweet corn and succulent crab meat creates a harmonious balance of flavors that is both comforting and tantalizing.

Whether you’re a seasoned Cajun enthusiast or a newcomer to the vibrant cuisine, this recipe will transport you to the heart of Louisiana’s culinary traditions. Gather your loved ones around the table and indulge in this delectable bisque, a testament to the rich and diverse flavors that make Cajun cuisine a culinary masterpiece.

Share:

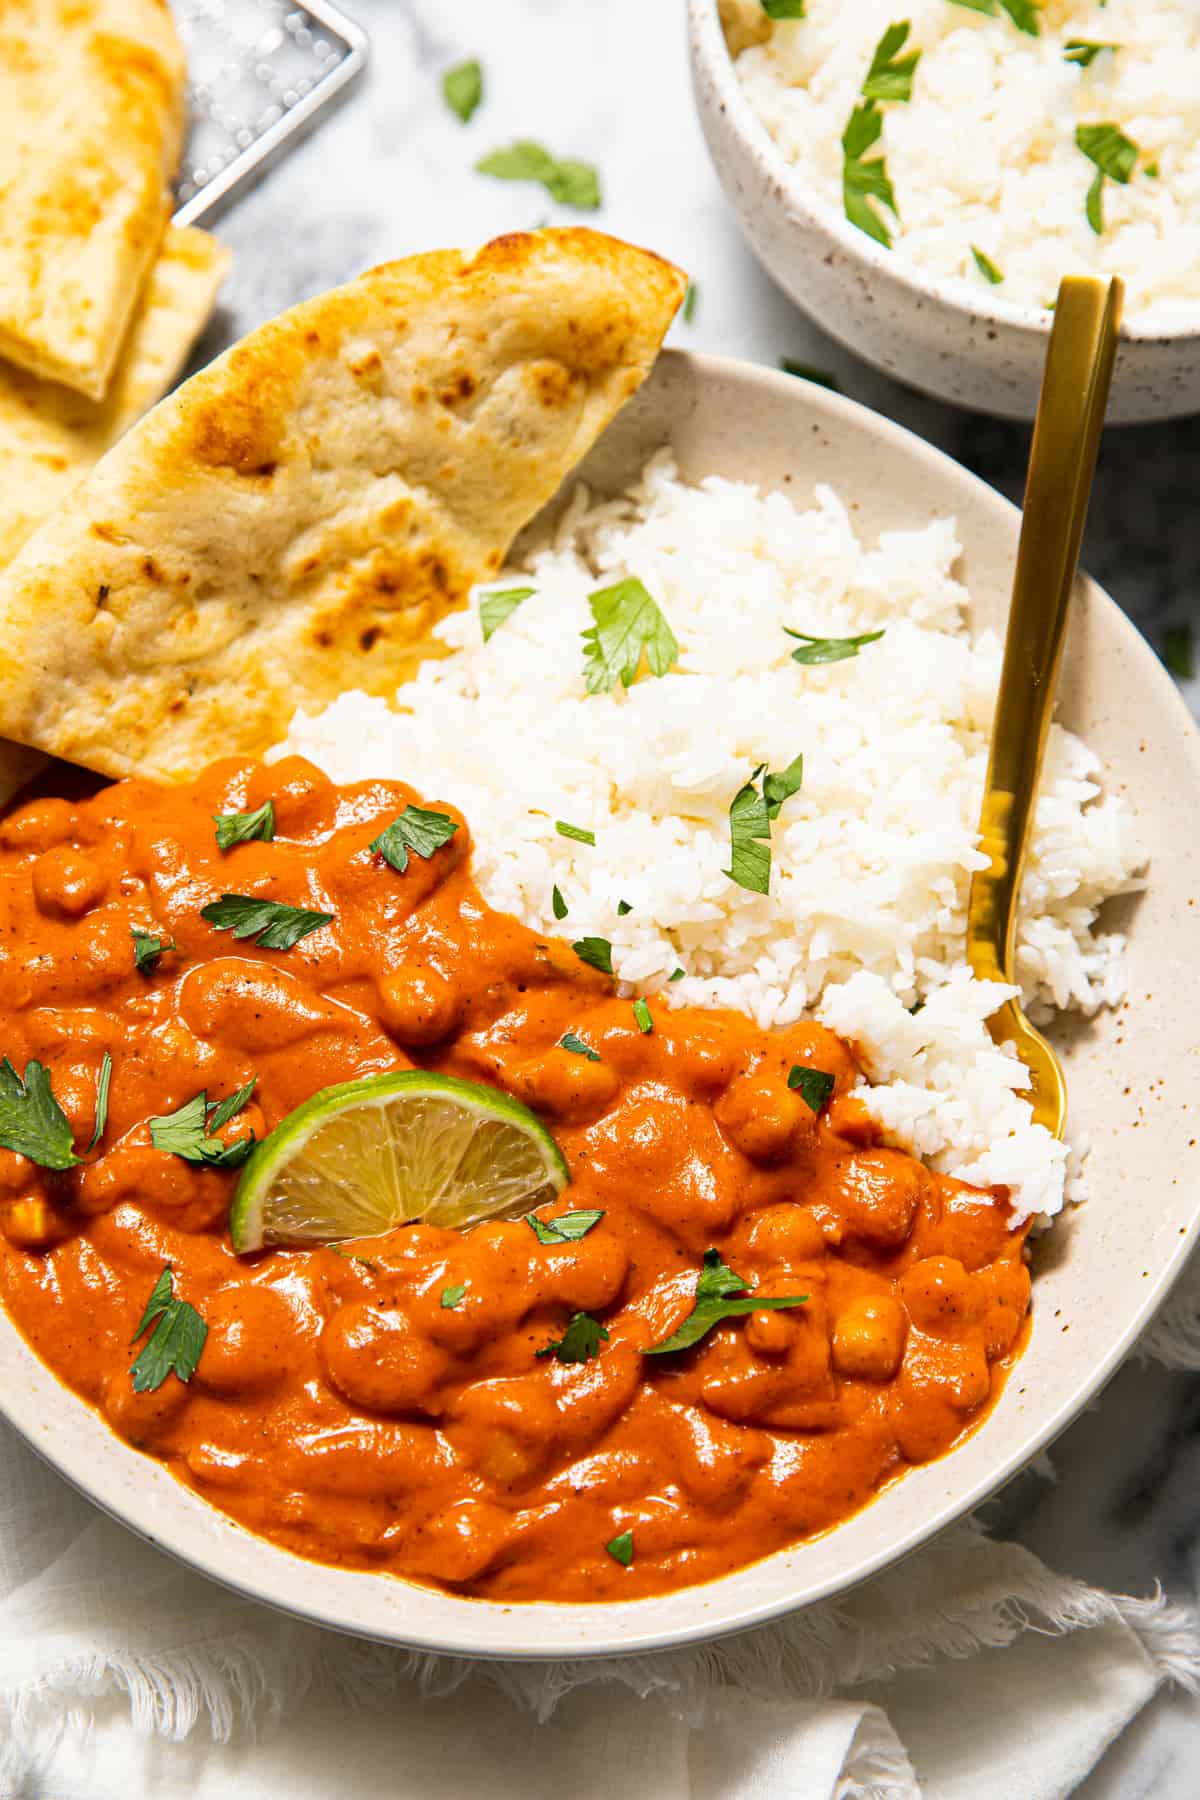
Recipes Vegetarian Tikka Masala

Vegetarian Tikka Masala: A Culinary Journey to Flavorful Delights

Introduction

Tikka masala, an iconic dish originating from the vibrant streets of India, has captivated taste buds worldwide with its tantalizing blend of aromatic spices, creamy sauce, and succulent vegetables. While traditionally prepared with chicken, vegetarian tikka masala offers a delectable alternative, showcasing the versatility and ingenuity of Indian cuisine. This article delves into the culinary secrets of vegetarian tikka masala, providing a comprehensive guide to creating this flavorful masterpiece at home.

Ingredients: A Symphony of Flavors

The essence of vegetarian tikka masala lies in its carefully curated ingredients, each contributing a distinct layer of flavor to the dish.

Vegetables:

  • 1 large onion, chopped
  • 1 green bell pepper, chopped
  • 1 red bell pepper, chopped
  • 1 large carrot, peeled and chopped
  • 1 cup cauliflower florets
  • 1 cup broccoli florets
  • 1 cup paneer (Indian cottage cheese), cubed

Spices:

  • 2 tablespoons ground cumin
  • 1 tablespoon ground coriander
  • 1 teaspoon turmeric powder
  • 1 teaspoon red chili powder
  • 1 teaspoon garam masala
  • 1 teaspoon ginger-garlic paste
  • 1 teaspoon salt

Sauce:

  • 1 (15-ounce) can of tomato sauce
  • 1 (14-ounce) can of coconut milk
  • 1 cup heavy cream
  • 1 tablespoon cornstarch
  • 1/4 cup water

Instructions: A Step-by-Step Guide

Step 1: Prepare the Vegetables

  • Heat 2 tablespoons of oil in a large skillet or Dutch oven over medium heat.
  • Add the onion and cook until softened and translucent, about 5 minutes.
  • Add the bell peppers, carrot, cauliflower, and broccoli, and cook until slightly tender, about 5 minutes more.
  • Remove the vegetables from the skillet and set aside.

Step 2: Marinate the Paneer

  • In a bowl, combine the paneer with the ginger-garlic paste, turmeric powder, and salt.
  • Mix well and set aside for at least 15 minutes.

Step 3: Make the Sauce

  • In the same skillet, add 2 tablespoons of oil and heat over medium heat.
  • Add the cumin, coriander, red chili powder, and garam masala, and cook for 1 minute, stirring constantly.
  • Add the tomato sauce and bring to a simmer.
  • In a small bowl, whisk together the coconut milk, heavy cream, cornstarch, and water until smooth.
  • Gradually add the coconut milk mixture to the tomato sauce, stirring constantly.
  • Bring to a boil, then reduce heat and simmer for 10 minutes, or until the sauce has thickened.

Step 4: Combine the Vegetables and Paneer

  • Add the reserved vegetables and marinated paneer to the sauce.
  • Bring to a simmer and cook for 5-7 minutes, or until the paneer is cooked through.

Step 5: Serve and Enjoy

  • Serve vegetarian tikka masala hot with basmati rice, naan bread, or your favorite side dish.
  • Garnish with fresh cilantro for an extra burst of flavor.

Tips for Culinary Excellence

  • For a richer flavor, use homemade ginger-garlic paste.
  • If you don’t have paneer, you can substitute tofu or tempeh.
  • Adjust the amount of red chili powder to suit your spice preference.
  • Serve with a dollop of plain yogurt to balance the heat.
  • For a vegan version, use plant-based milk and yogurt.

Health Benefits: A Nutritious Delight

Beyond its delectable taste, vegetarian tikka masala offers an array of health benefits:

  • Rich in antioxidants from vegetables and spices
  • Good source of fiber from vegetables and legumes
  • Contains protein from paneer or tofu
  • Low in saturated fat and cholesterol

Conclusion

Vegetarian tikka masala is a culinary masterpiece that combines the vibrant flavors of India with the convenience of home cooking. By following the steps outlined in this article, you can create this delectable dish in your own kitchen, impressing your family and friends with your culinary prowess. Whether you’re a seasoned cook or a novice in the kitchen, vegetarian tikka masala is an accessible and rewarding recipe that will tantalize your taste buds and nourish your body.

Share:

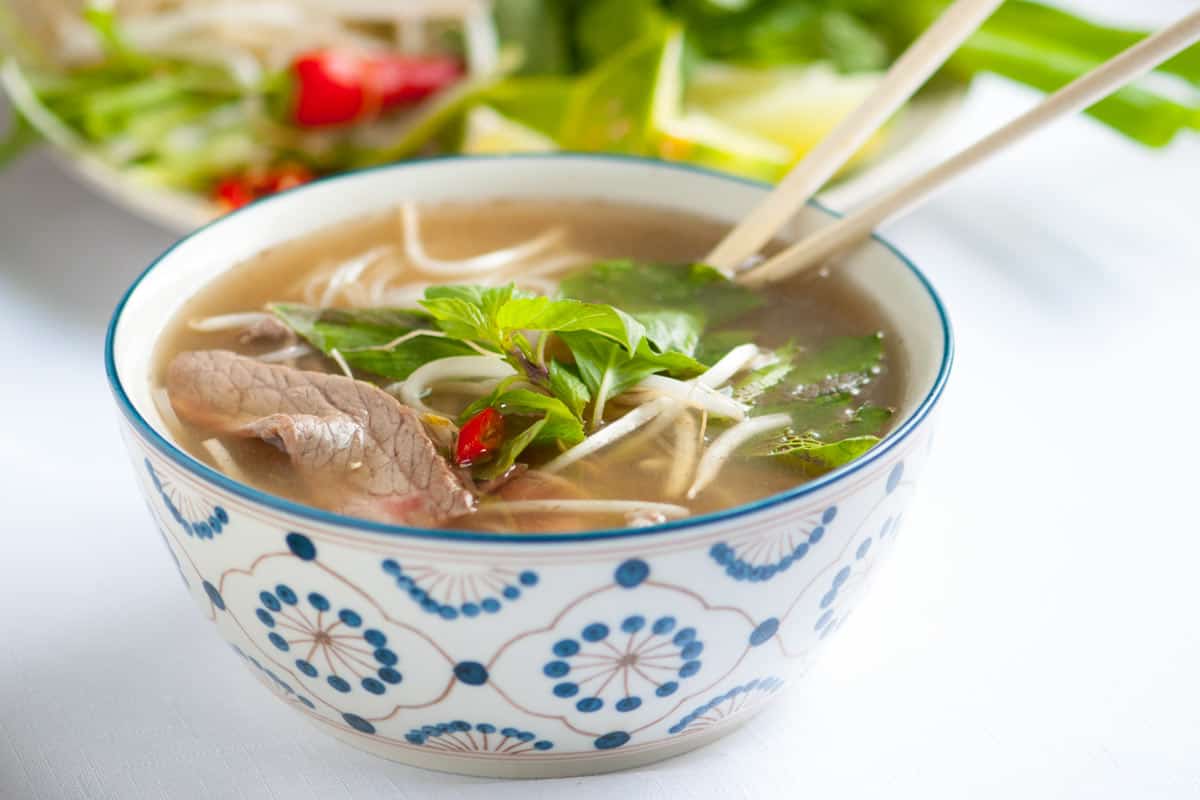
Recipes Vietnamese Pho

Vietnamese Pho: A Culinary Journey into Flavor and Tradition

Pho, a quintessential Vietnamese dish, has captivated the hearts and palates of food enthusiasts worldwide. Its aromatic broth, tender meat, and vibrant toppings create a symphony of flavors that leave an unforgettable impression. Whether enjoyed as a comforting breakfast, a hearty lunch, or a satisfying dinner, pho embodies the essence of Vietnamese cuisine.

A Culinary History Steeped in Tradition

The origins of pho can be traced back to the early 20th century in northern Vietnam. It is believed that street vendors in Hanoi began selling a simple dish of beef noodle soup, known as "pho bo." Over time, the dish evolved, incorporating influences from French colonial cuisine and local ingredients.

Pho quickly gained popularity throughout Vietnam and beyond, becoming a beloved national dish. Today, it is a staple in Vietnamese restaurants worldwide, showcasing the country’s rich culinary heritage.

Deconstructing the Elements of Pho

A traditional bowl of pho consists of several key elements that come together to create its distinctive flavor profile:

1. The Broth:

The foundation of pho lies in its aromatic broth, which is the result of hours of simmering beef bones, spices, and herbs. The bones provide a rich collagen base, while the spices and herbs infuse the broth with a complex blend of flavors. Common ingredients include star anise, cinnamon, cloves, ginger, and lemongrass.

2. The Noodles:

Pho noodles are made from rice flour and are characterized by their flat, wide shape. They are cooked in the broth until they are tender yet retain a slight chewiness. The noodles absorb the flavorful broth, creating a harmonious balance of textures.

3. The Meat:

Traditionally, pho is made with beef, either sliced thinly or as meatballs. The beef is cooked in the broth until tender and juicy, adding a savory depth to the dish. Other variations include chicken pho (pho ga) and seafood pho (pho hai san).

4. The Toppings:

A bowl of pho is incomplete without a vibrant array of toppings. These may include:

  • Fresh herbs: cilantro, mint, basil, and bean sprouts add a burst of freshness and herbaceous notes.
  • Vegetables: onions, scallions, and chili peppers provide a crunchy texture and a touch of spice.
  • Lime wedges: a squeeze of lime juice brightens the flavors and adds a citrusy tang.
  • Hoisin sauce and Sriracha: these condiments add a sweet and spicy kick, allowing diners to customize the intensity of their pho.

Crafting the Perfect Bowl of Pho

While pho can be enjoyed in restaurants, it is also a rewarding dish to make at home. Here is a step-by-step guide to creating your own authentic bowl of Vietnamese pho:

Ingredients:

  • For the broth:
    • 2 pounds beef bones (marrow bones preferred)
    • 1 large onion, quartered
    • 1 inch ginger, sliced
    • 3 cloves garlic, smashed
    • 1 star anise
    • 2 cinnamon sticks
    • 3 cloves
    • 1 teaspoon black peppercorns
    • 12 cups water
  • For the noodles:
    • 1 pound pho noodles
  • For the meat:
    • 1 pound beef flank steak, thinly sliced
  • For the toppings:
    • Fresh cilantro, mint, basil, and bean sprouts
    • Onions, scallions, and chili peppers
    • Lime wedges
    • Hoisin sauce and Sriracha (optional)

Instructions:

1. Make the broth:

  • In a large stockpot, combine the beef bones, onion, ginger, garlic, star anise, cinnamon, cloves, black peppercorns, and water.
  • Bring to a boil over high heat, then reduce heat to low and simmer for 6-8 hours, or until the broth is rich and flavorful.
  • Strain the broth through a fine-mesh sieve into a clean pot.

2. Cook the noodles:

  • In a large pot of boiling water, cook the pho noodles according to the package instructions.
  • Drain the noodles and rinse them under cold water.

3. Cook the meat:

  • In a separate pot, bring the broth to a boil.
  • Add the beef slices and cook until they are tender and cooked to your desired doneness.

4. Assemble the pho:

  • In a large bowl, place a portion of the noodles.
  • Top with the cooked beef, broth, and desired toppings.
  • Serve immediately with lime wedges, hoisin sauce, and Sriracha on the side.

Variations and Regional Styles

While the traditional beef pho is the most well-known, there are numerous variations and regional styles of pho throughout Vietnam. Some popular variations include:

  • Pho Ga: Chicken pho, made with a lighter broth and tender chicken meat.
  • Pho Hai San: Seafood pho, featuring a variety of seafood, such as shrimp, squid, and mussels.
  • Pho Cuon: Pho rolls, where the noodles and toppings are wrapped in rice paper and served with a dipping sauce.
  • Pho Xao: Stir-fried pho, where the noodles are stir-fried with vegetables and meat.

Health Benefits of Pho

In addition to its delicious flavor, pho also offers several health benefits:

  • Rich in protein: The beef or chicken provides a substantial amount of protein, which is essential for building and repairing tissues.
  • Collagen-rich broth: The broth contains collagen, a protein that supports joint health and skin elasticity.
  • Low in calories: A bowl of pho is relatively low in calories, making it a guilt-free meal option.
  • Good source of vitamins and minerals: The broth and vegetables provide vitamins and minerals, such as iron, zinc, and vitamin C.

Cultural Significance and Social Impact

Pho is more than just a dish; it is an integral part of Vietnamese culture and social life. It is often enjoyed as a communal meal, bringing people together to share stories and laughter. Pho restaurants are ubiquitous in Vietnam, serving as gathering places for families, friends, and colleagues.

The popularity of pho has also had a significant social impact. It has become a symbol of Vietnamese cuisine and has helped to introduce Vietnamese culture to the world. Pho restaurants have opened in major cities around the globe, showcasing the richness and diversity of Vietnamese culinary traditions.

Conclusion

Vietnamese pho is a culinary masterpiece that embodies the flavors, traditions, and cultural significance of Vietnam. Its aromatic broth, tender meat, and vibrant toppings create a symphony of flavors that captivates the senses. Whether enjoyed as a comforting breakfast, a hearty lunch, or a satisfying dinner, pho is a dish that transcends mere sustenance and becomes an unforgettable culinary experience. As the popularity of pho continues to grow worldwide, it serves as a testament to the enduring power of Vietnamese cuisine and its ability to connect people through the shared love of food.

Share:

Recipes Teriyaki Vegetable Stir-Fry

Teriyaki Vegetable Stir-Fry: A Flavorful and Healthy Dish

Stir-fries are a quick and easy way to get a healthy and delicious meal on the table. This teriyaki vegetable stir-fry is packed with colorful vegetables and coated in a flavorful teriyaki sauce. It’s a great way to use up leftover vegetables or to get your kids to eat their veggies.

Ingredients:

  • 1 tablespoon vegetable oil
  • 1 onion, chopped
  • 2 cloves garlic, minced
  • 1 red bell pepper, chopped
  • 1 green bell pepper, chopped
  • 1 head of broccoli, cut into florets
  • 1 cup snap peas, trimmed
  • 1 cup carrots, peeled and sliced
  • 1 cup snow peas, trimmed
  • 1/2 cup water
  • 1/4 cup teriyaki sauce
  • 1 tablespoon soy sauce
  • 1 teaspoon sesame oil
  • 1/4 teaspoon ground black pepper

Instructions:

  1. Heat the vegetable oil in a large skillet or wok over medium-high heat.
  2. Add the onion and garlic and cook until softened, about 5 minutes.
  3. Add the bell peppers, broccoli, snap peas, carrots, and snow peas and cook until the vegetables are tender, about 10 minutes.
  4. Add the water, teriyaki sauce, soy sauce, sesame oil, and black pepper to the skillet and stir to combine.
  5. Cook until the sauce has thickened and the vegetables are coated, about 2 minutes.
  6. Serve immediately over rice or noodles.

Tips:

  • For a vegetarian stir-fry, omit the chicken.
  • To make the stir-fry gluten-free, use gluten-free soy sauce and teriyaki sauce.
  • Add other vegetables to the stir-fry, such as zucchini, mushrooms, or baby corn.
  • Serve the stir-fry with your favorite sides, such as rice, noodles, or steamed vegetables.

Variations:

  • Spicy Teriyaki Vegetable Stir-Fry: Add 1 teaspoon of Sriracha or chili powder to the sauce.
  • Sweet and Sour Teriyaki Vegetable Stir-Fry: Add 1 tablespoon of honey or brown sugar to the sauce.
  • Sesame Teriyaki Vegetable Stir-Fry: Add 1 tablespoon of sesame seeds to the sauce.
  • Ginger Teriyaki Vegetable Stir-Fry: Add 1 teaspoon of grated ginger to the sauce.

FAQs:

  • What is teriyaki sauce? Teriyaki sauce is a Japanese sauce made from soy sauce, mirin, sake, and sugar. It has a sweet and savory flavor.
  • Can I make my own teriyaki sauce? Yes, you can make your own teriyaki sauce by combining soy sauce, mirin, sake, and sugar in a saucepan and simmering until the sugar has dissolved.
  • What is the best way to cook a stir-fry? The best way to cook a stir-fry is to use a large skillet or wok over high heat. This will help the vegetables to cook quickly and evenly.
  • How do I know when the stir-fry is done? The stir-fry is done when the vegetables are tender and the sauce has thickened.

Conclusion:

Teriyaki vegetable stir-fry is a delicious and healthy meal that is easy to make. It’s a great way to use up leftover vegetables or to get your kids to eat their veggies. With its flavorful teriyaki sauce and colorful vegetables, this stir-fry is sure to be a hit.

Share:

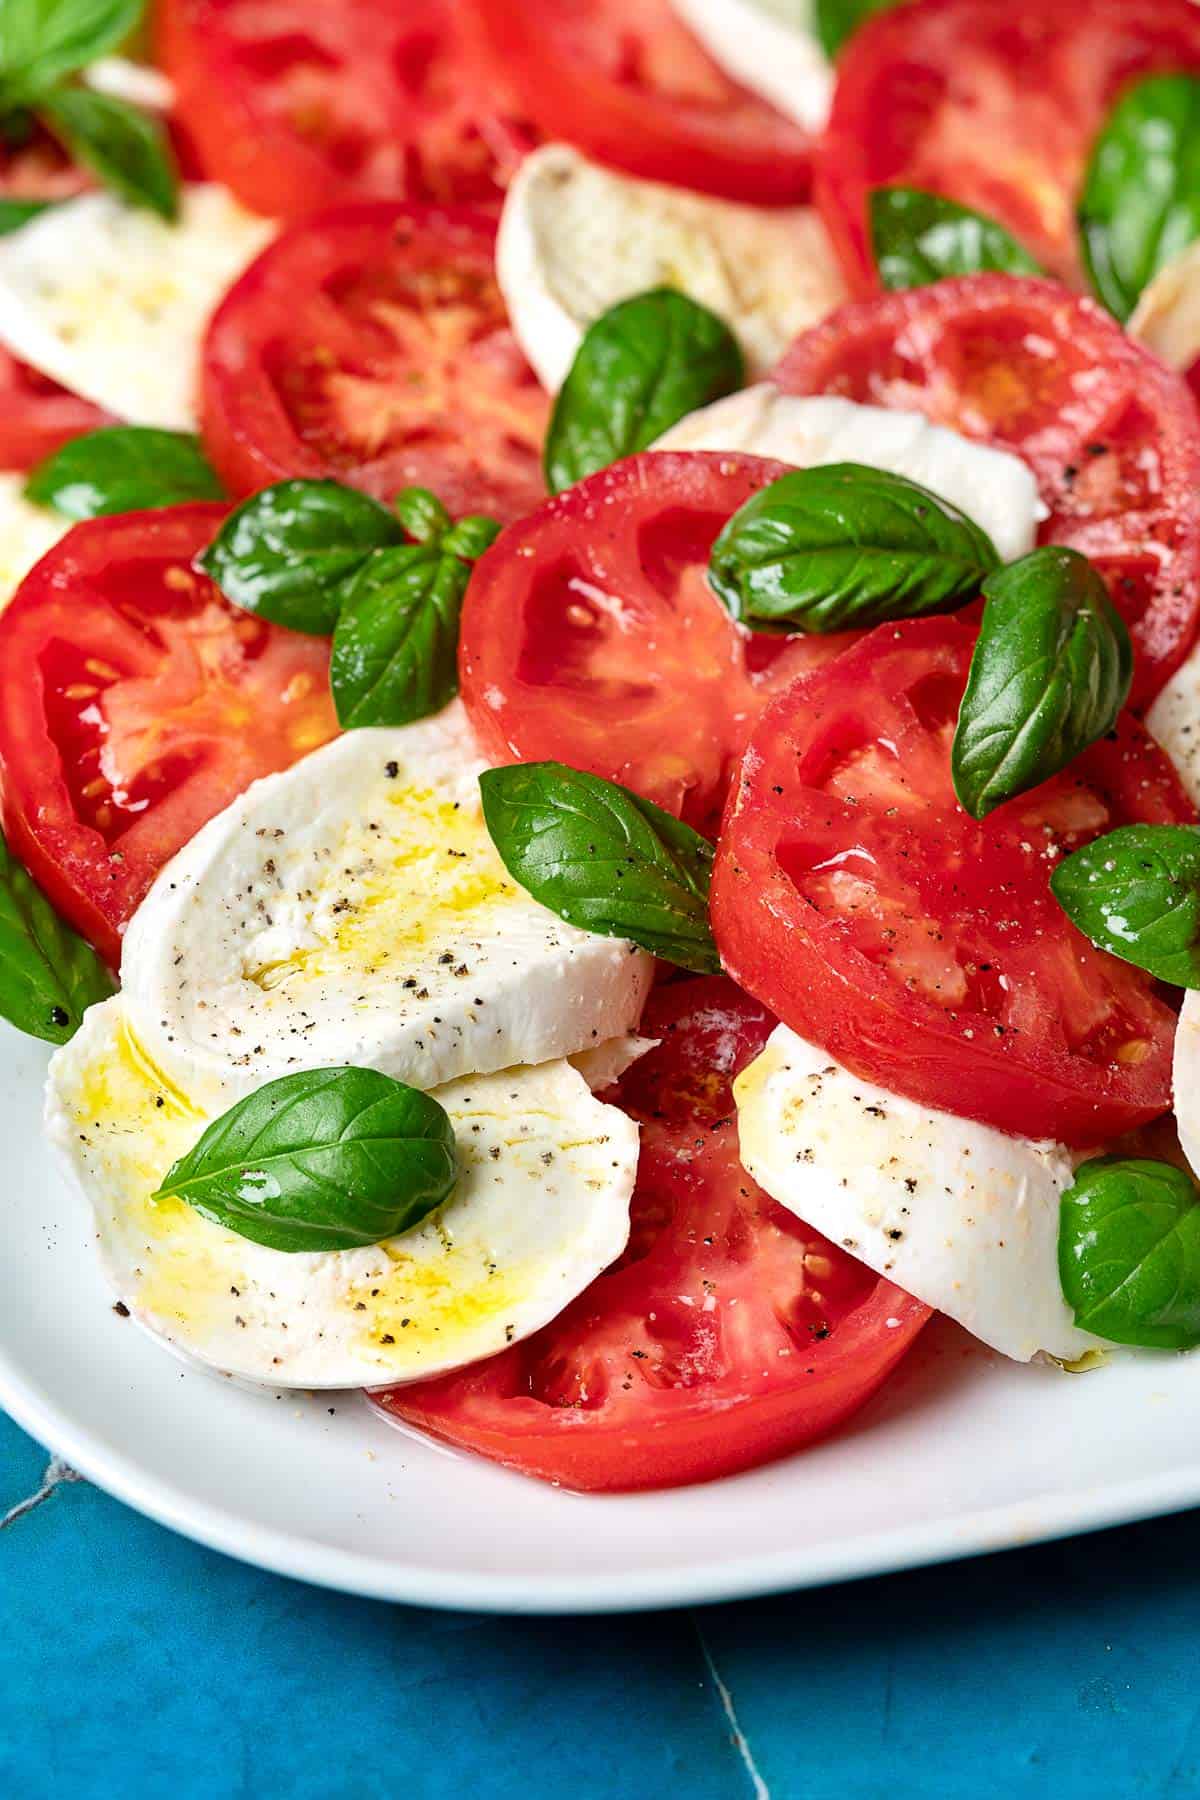
Recipes Caprese Salad

Caprese Salad: A Culinary Symphony of Freshness and Flavor

In the realm of culinary delights, Caprese salad stands as a testament to the exquisite simplicity of Italian cuisine. This vibrant and refreshing dish, originating from the sun-kissed island of Capri, has captured the hearts and palates of food enthusiasts worldwide. With its vibrant colors, tantalizing textures, and symphony of flavors, Caprese salad embodies the essence of summer and the Mediterranean way of life.

A Culinary Canvas of Fresh Ingredients

The beauty of Caprese salad lies in its minimalist approach, showcasing the natural flavors of its core ingredients. At its heart, this dish is a harmonious blend of:

  • Ripe Tomatoes: The foundation of the salad, ripe tomatoes provide a juicy and sweet base. Choose firm, flavorful varieties like Roma or heirloom tomatoes.

  • Fresh Mozzarella: Creamy and slightly tangy, fresh mozzarella adds a rich and decadent element. Opt for high-quality, artisanal mozzarella for optimal flavor.

  • Sweet Basil: The aromatic herb that defines Caprese salad, fresh basil adds a burst of herbaceousness and freshness. Use large, fragrant leaves for maximum impact.

Variations on a Classic Theme

While the traditional Caprese salad is a culinary masterpiece in its own right, there are countless variations that explore different flavor profiles and textures. Some popular adaptations include:

  • Caprese with Balsamic Glaze: A drizzle of tangy balsamic glaze adds a touch of sweetness and complexity to the salad.

  • Caprese with Roasted Peppers: Roasted red or yellow peppers introduce a smoky and slightly sweet flavor dimension.

  • Caprese with Prosciutto: Thinly sliced prosciutto adds a salty and savory element, creating a delightful contrast to the sweetness of the tomatoes.

  • Caprese with Arugula: Arugula’s peppery bite adds a refreshing and slightly bitter note to the salad.

The Art of Preparation: A Culinary Ritual

Preparing Caprese salad is an art form in itself, requiring precision and attention to detail. Follow these steps to create a visually stunning and palate-pleasing dish:

  1. Slice the Tomatoes: Cut the tomatoes into uniform slices, about 1/2 inch thick. Arrange them on a serving platter or individual plates.

  2. Tear the Mozzarella: Tear the mozzarella into bite-sized pieces and scatter them over the tomatoes.

  3. Add the Basil: Sprinkle the fresh basil leaves generously over the salad.

  4. Drizzle with Olive Oil: Pour a drizzle of high-quality extra virgin olive oil over the salad, coating the ingredients evenly.

  5. Season with Salt and Pepper: Season the salad lightly with salt and freshly ground black pepper to taste.

Serving Suggestions: A Culinary Canvas

Caprese salad is a versatile dish that can be enjoyed as an appetizer, side dish, or even a light lunch. Here are some serving suggestions:

  • As an Appetizer: Serve Caprese salad on small plates or skewers as a refreshing start to a meal.

  • As a Side Dish: Pair Caprese salad with grilled meats, fish, or pasta dishes to add a touch of freshness and flavor.

  • As a Light Lunch: Serve Caprese salad on a bed of mixed greens with a side of bread for a satisfying and healthy midday meal.

The Health Benefits of Caprese Salad: A Culinary Elixir

Beyond its culinary appeal, Caprese salad is also a nutritional powerhouse, offering a range of health benefits:

  • Rich in Antioxidants: Tomatoes and basil are both excellent sources of antioxidants, which protect cells from damage.

  • Low in Calories: Caprese salad is a low-calorie dish, making it a guilt-free indulgence.

  • Good Source of Vitamins and Minerals: Tomatoes, mozzarella, and basil provide a good source of vitamins A, C, and K, as well as calcium and iron.

Caprese Salad: A Culinary Legacy

Caprese salad has become a culinary icon, transcending its humble origins to become a beloved dish around the world. Its simplicity, freshness, and versatility have made it a staple in restaurants, home kitchens, and picnic baskets alike. Whether enjoyed as an appetizer, side dish, or light lunch, Caprese salad is a culinary delight that will continue to captivate taste buds for generations to come.

Share:

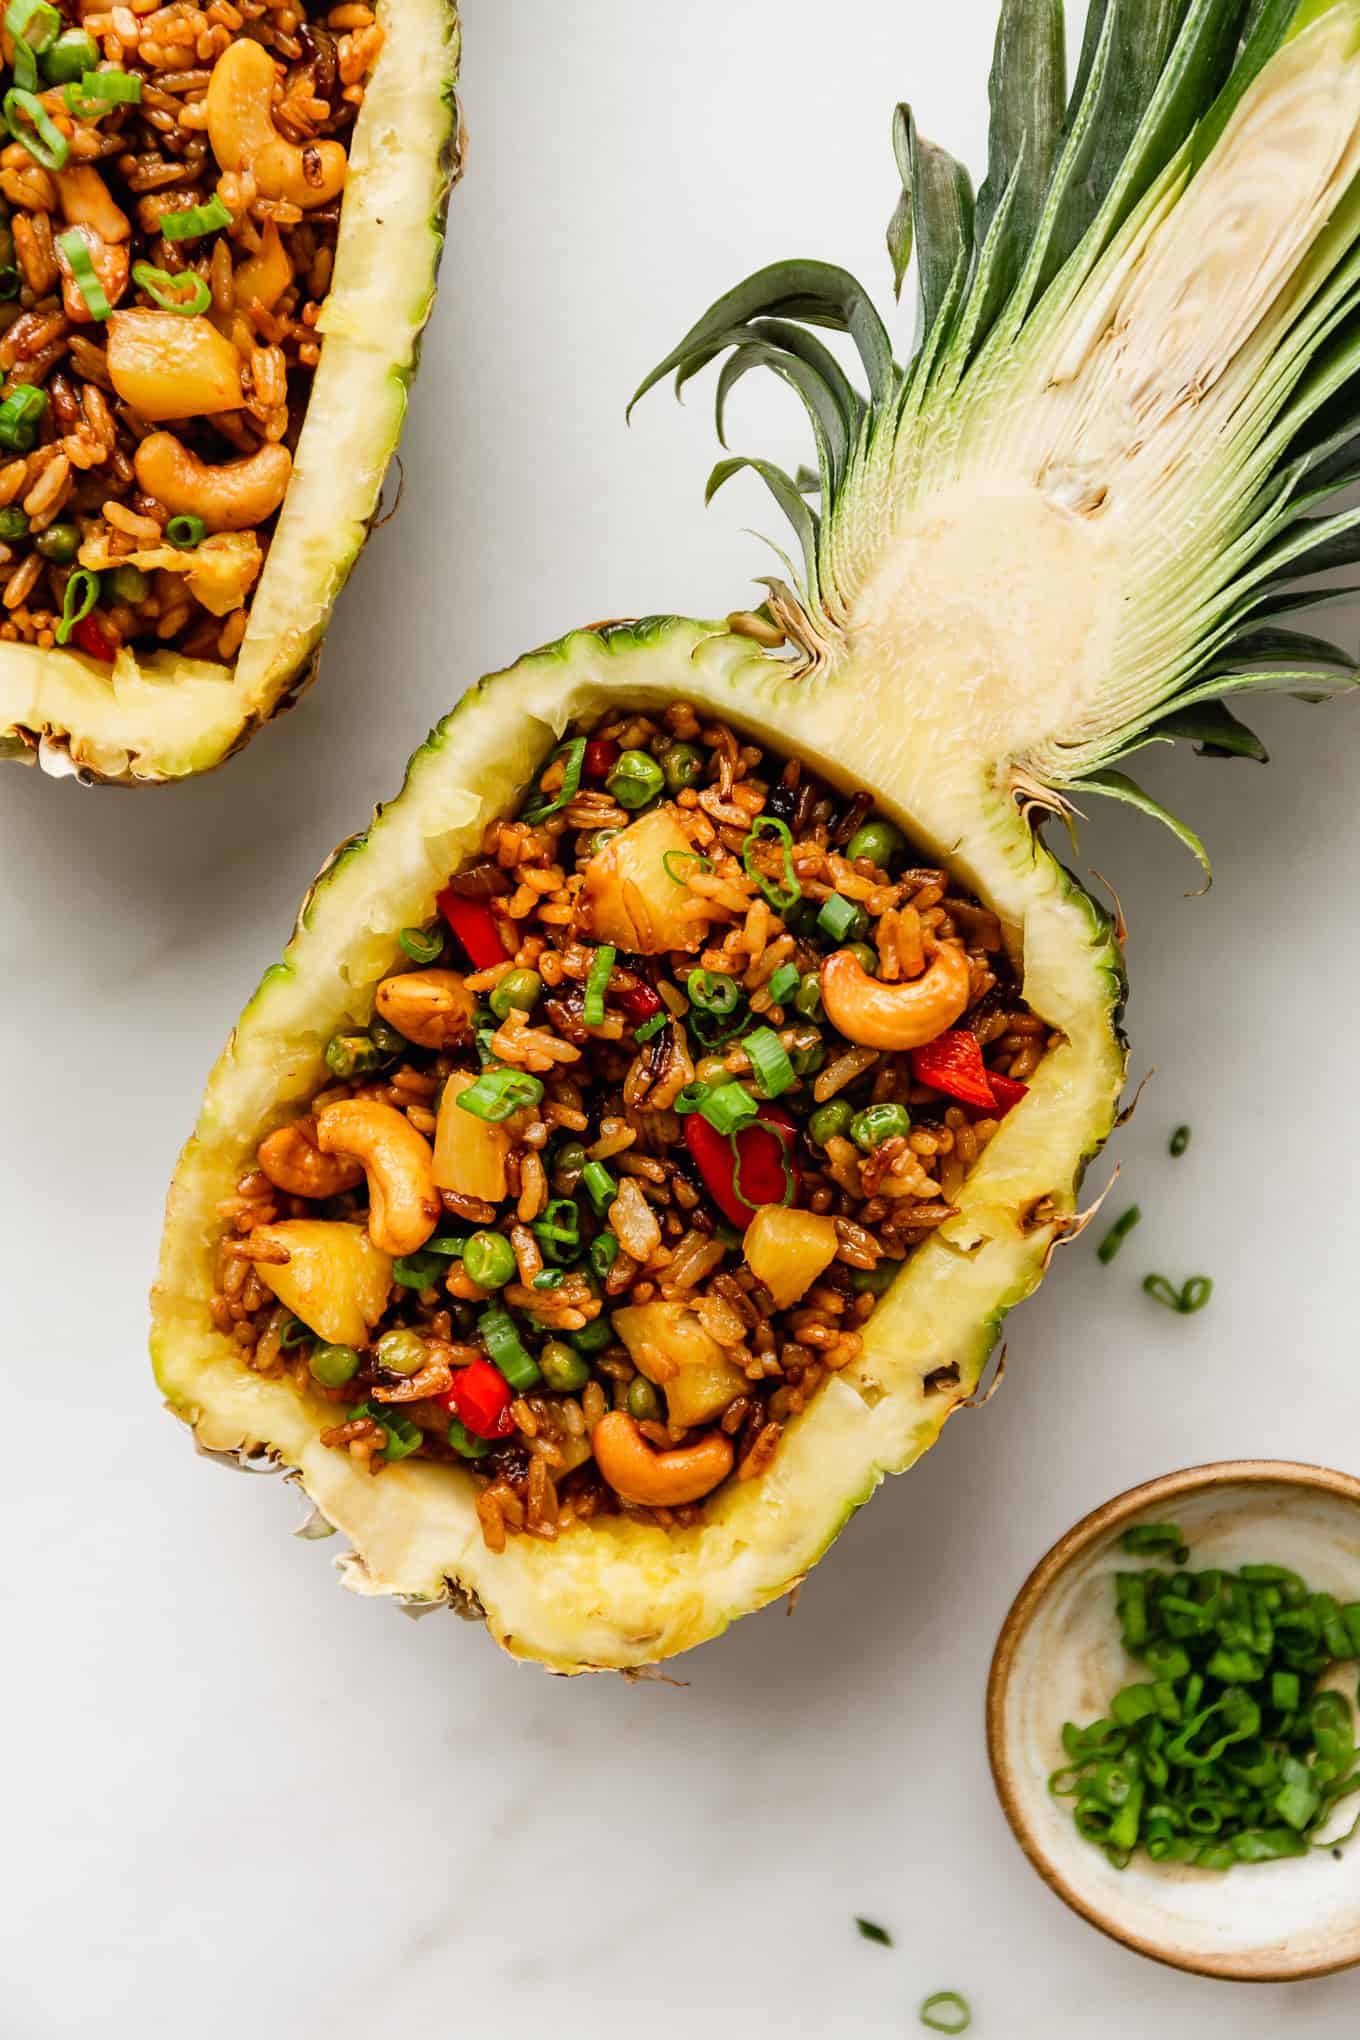
Recipes Thai Pineapple Fried Rice

Thai Fried Rice: A Culinary Symphony of Flavors and Textures

Thai fried rice, known as "Khao Pad" in Thai, is a beloved dish that has captivated taste buds worldwide. Its vibrant colors, aromatic blend of spices, and irresistible combination of textures make it a culinary masterpiece. This comprehensive article delves into the intricacies of Thai fried rice, exploring its history, variations, ingredients, and the step-by-step process of creating this tantalizing dish.

Historical Roots and Cultural Significance

The origins of Thai fried rice can be traced back to the 14th century, during the Ayutthaya Kingdom. It is believed to have evolved from Chinese immigrants who introduced their stir-frying techniques to Thailand. Over the centuries, Thai fried rice has become an integral part of Thai cuisine, enjoyed as a street food, a home-cooked meal, and a staple in restaurants.

Variations and Regional Adaptations

Thai fried rice is not a monolithic dish but rather a canvas for culinary creativity. Regional variations and personal preferences have given rise to a wide array of flavors and ingredients. Some of the most popular variations include:

  • Khao Pad Sapparot (Pineapple Fried Rice): A sweet and tangy version with pineapple chunks, tomatoes, and cashews.
  • Khao Pad Tom Yum (Tom Yum Fried Rice): A spicy and flavorful rendition infused with the aromatic flavors of Tom Yum soup.
  • Khao Pad Pu (Crab Fried Rice): A luxurious version featuring succulent crab meat, often combined with eggs and vegetables.
  • Khao Pad Neua (Beef Fried Rice): A savory and hearty version with tender beef slices, onions, and bell peppers.
  • Khao Pad Kai (Chicken Fried Rice): A classic version with shredded chicken, eggs, and a medley of vegetables.

Essential Ingredients and Their Roles

The symphony of flavors in Thai fried rice stems from a carefully curated blend of ingredients. Each component plays a crucial role in creating the dish’s distinctive character:

  • Jasmine Rice: The foundation of Thai fried rice, jasmine rice is known for its delicate aroma and fluffy texture.
  • Protein: Typically chicken, beef, pork, or shrimp, protein provides a savory and substantial base.
  • Eggs: Eggs add richness, texture, and a golden hue to the dish.
  • Vegetables: A vibrant array of vegetables, such as onions, carrots, bell peppers, and green beans, contribute color, crunch, and nutritional value.
  • Sauce: A blend of soy sauce, fish sauce, oyster sauce, and other seasonings creates the savory and umami-rich base flavor.
  • Spices: A symphony of spices, including garlic, ginger, chili peppers, and turmeric, adds depth and warmth to the dish.

Step-by-Step Guide to Creating Thai Fried Rice

Creating Thai fried rice is a culinary adventure that can be enjoyed by home cooks of all skill levels. Follow these steps to craft a delectable and authentic dish:

  1. Prepare the Ingredients: Chop the vegetables, slice the protein, and whisk the sauce ingredients together.
  2. Cook the Rice: Rinse the jasmine rice and cook it according to the package instructions. Allow it to cool slightly before frying.
  3. Heat the Wok or Pan: Heat a wok or large skillet over high heat. Add a drizzle of oil and swirl to coat the surface.
  4. Stir-Fry the Protein: Add the protein to the hot wok and stir-fry until cooked through. Remove from the wok and set aside.
  5. Stir-Fry the Vegetables: Add the vegetables to the wok and stir-fry until tender-crisp.
  6. Add the Rice: Spread the cooked rice evenly over the vegetables. Use a spatula to break up any clumps.
  7. Add the Sauce: Pour the prepared sauce over the rice and stir-fry to combine.
  8. Return the Protein: Add the cooked protein back to the wok and stir-fry to heat through.
  9. Add the Eggs: Push the rice and vegetables to the sides of the wok. Crack the eggs into the center and scramble them until cooked.
  10. Combine and Season: Mix the eggs, rice, and vegetables together. Season with additional soy sauce or fish sauce to taste.
  11. Garnish and Serve: Transfer the fried rice to a serving dish and garnish with fresh cilantro, lime wedges, and chili peppers.

Tips for Enhancing Flavor and Texture

  • Use Day-Old Rice: Day-old rice has less moisture, resulting in a fluffier and less sticky fried rice.
  • Heat the Wok or Pan Thoroughly: A hot cooking surface ensures even cooking and prevents the rice from sticking.
  • Stir-Fry in Batches: If cooking a large amount of rice, stir-fry in batches to avoid overcrowding the wok and ensure even cooking.
  • Use a Wok Spatula: A wok spatula with a curved edge is ideal for flipping and stirring the rice without breaking it.
  • Don’t Overcook the Rice: Overcooked rice will become mushy and lose its texture.
  • Adjust Seasonings to Taste: Thai fried rice should be flavorful but not overpowering. Adjust the seasonings to your personal preference.

Conclusion

Thai fried rice is a culinary masterpiece that embodies the vibrant flavors and textures of Thai cuisine. Its versatility, ease of preparation, and endless variations make it a beloved dish enjoyed around the world. Whether you’re a seasoned cook or a culinary novice, this comprehensive guide will empower you to create an authentic and delectable Thai fried rice that will tantalize your taste buds and leave you craving more. So gather your ingredients, heat up your wok, and embark on a culinary adventure that will transport you to the vibrant streets of Thailand.

Share:

Recipes Lemon Garlic Butter Shrimp And Spinach

Lemon Garlic Butter Shrimp and Spinach: A Culinary Symphony of Flavors

Indulge in a culinary masterpiece that tantalizes your taste buds and elevates your dining experience. Lemon Garlic Butter Shrimp and Spinach is a symphony of flavors that will leave you craving for more. This delectable dish combines the succulent sweetness of shrimp, the aromatic zest of lemon, the savory richness of garlic, and the vibrant freshness of spinach, creating a harmonious balance that will delight your palate.

Ingredients:

  • 1 pound large shrimp, peeled and deveined
  • 1 tablespoon olive oil
  • 4 cloves garlic, minced
  • 1/2 cup white wine (optional)
  • 1/2 cup chicken broth
  • 1/2 cup heavy cream
  • 1/4 cup grated Parmesan cheese
  • 1/4 cup chopped fresh parsley
  • 1/4 cup chopped fresh basil
  • 1 lemon, zested and juiced
  • 1 pound fresh spinach, washed and chopped
  • Salt and pepper to taste

Instructions:

  1. Season the Shrimp: In a large bowl, combine the shrimp with olive oil, salt, and pepper. Toss to coat evenly.

  2. Sauté the Garlic: Heat a large skillet over medium heat. Add the garlic and sauté for 1-2 minutes, or until fragrant.

  3. Deglaze the Pan (Optional): If using white wine, pour it into the skillet and let it simmer for 1-2 minutes, or until reduced by half.

  4. Add the Shrimp: Add the seasoned shrimp to the skillet and cook for 2-3 minutes per side, or until opaque and cooked through.

  5. Create the Sauce: Pour the chicken broth into the skillet and bring to a simmer. Add the heavy cream, Parmesan cheese, parsley, basil, lemon zest, and lemon juice. Stir to combine.

  6. Add the Spinach: Add the chopped spinach to the skillet and cook for 1-2 minutes, or until wilted.

  7. Season to Taste: Taste the sauce and adjust seasonings with additional salt and pepper as needed.

  8. Serve: Transfer the Lemon Garlic Butter Shrimp and Spinach to a serving dish and garnish with fresh parsley and lemon wedges.

Tips:

  • For a richer flavor, use jumbo shrimp.
  • If you don’t have white wine, you can substitute it with additional chicken broth.
  • You can add a pinch of red pepper flakes for a touch of spice.
  • Serve the dish over pasta, rice, or crusty bread to soak up the delicious sauce.
  • For a healthier option, use low-fat milk or cream instead of heavy cream.

Variations:

  • Spicy Shrimp: Add a pinch of cayenne pepper or chili powder to the sauce for a spicy kick.
  • Sun-Dried Tomato Shrimp: Add chopped sun-dried tomatoes to the skillet along with the garlic.
  • Lemon-Herb Shrimp: Add a tablespoon of chopped fresh thyme or oregano to the sauce for an extra burst of flavor.
  • Creamy Pesto Shrimp: Stir in a tablespoon of pesto sauce to the cream mixture for a nutty and aromatic twist.

Nutritional Information:

One serving of Lemon Garlic Butter Shrimp and Spinach (without pasta or rice) contains approximately:

  • Calories: 350
  • Protein: 30 grams
  • Carbohydrates: 15 grams
  • Fat: 20 grams

Conclusion:

Lemon Garlic Butter Shrimp and Spinach is a culinary masterpiece that will elevate any occasion. Its tantalizing flavors, vibrant colors, and ease of preparation make it a perfect dish for both casual and formal gatherings. Whether you’re a seasoned chef or a novice cook, this recipe will guide you through the process of creating a dish that will impress your family and friends. So gather your ingredients, fire up your stove, and prepare to embark on a culinary journey that will leave your taste buds dancing with delight.

Share:

Recipes Mexican Chicken Enchilada Casserole

Mexican Chicken Enchilada Casserole: A Culinary Fiesta in Every Bite

Indulge in the vibrant flavors and aromas of Mexico with our delectable Mexican Chicken Enchilada Casserole. This culinary masterpiece combines tender chicken, savory enchilada sauce, and a symphony of Mexican spices, all enveloped in a blanket of melted cheese. Prepare to embark on a culinary adventure that will tantalize your taste buds and leave you craving more.

Ingredients:

For the Chicken:

  • 1 pound boneless, skinless chicken breasts
  • 1 tablespoon olive oil
  • 1 onion, chopped
  • 2 cloves garlic, minced
  • 1 teaspoon chili powder
  • 1 teaspoon cumin
  • 1/2 teaspoon oregano
  • 1/4 teaspoon salt
  • 1/4 teaspoon black pepper

For the Enchilada Sauce:

  • 1 (28-ounce) can tomato sauce
  • 1 (10-ounce) can diced tomatoes with green chilies
  • 1/2 onion, chopped
  • 2 cloves garlic, minced
  • 1 tablespoon chili powder
  • 1 teaspoon cumin
  • 1/2 teaspoon oregano
  • 1/4 teaspoon salt
  • 1/4 teaspoon black pepper

For the Casserole:

  • 12 corn tortillas
  • 1 cup shredded cheddar cheese
  • 1 cup shredded Monterey Jack cheese
  • 1/2 cup sour cream
  • 1/4 cup chopped cilantro

Instructions:

Preparing the Chicken:

  1. Season the chicken breasts with salt and pepper.
  2. Heat the olive oil in a large skillet over medium heat.
  3. Add the chicken breasts and cook for 5-7 minutes per side, or until cooked through.
  4. Remove the chicken from the skillet and shred it using two forks.

Making the Enchilada Sauce:

  1. In a blender or food processor, combine the tomato sauce, diced tomatoes with green chilies, onion, garlic, chili powder, cumin, oregano, salt, and black pepper.
  2. Blend until smooth.

Assembling the Casserole:

  1. Preheat the oven to 350°F (175°C).
  2. Spread 1/2 cup of the enchilada sauce in the bottom of a 9×13-inch baking dish.
  3. Dip each tortilla into the remaining enchilada sauce and fill it with shredded chicken.
  4. Roll up the tortillas and place them seam side down in the baking dish.
  5. Pour the remaining enchilada sauce over the tortillas.
  6. Sprinkle the shredded cheddar cheese and Monterey Jack cheese on top.
  7. Bake for 20-25 minutes, or until the cheese is melted and bubbly.

Finishing Touches:

  1. Remove the casserole from the oven and let it cool for a few minutes.
  2. Top with sour cream and chopped cilantro.
  3. Serve hot with your favorite Mexican sides.

Tips:

  • For a spicier casserole, add more chili powder or diced jalapeños to the enchilada sauce.
  • If you don’t have corn tortillas, you can use flour tortillas instead.
  • You can also add other ingredients to the casserole, such as cooked beans, corn, or bell peppers.
  • Leftover casserole can be stored in the refrigerator for up to 3 days. Reheat in the oven or microwave before serving.

A Culinary Symphony:

Mexican Chicken Enchilada Casserole is a harmonious blend of flavors and textures that will leave you longing for more. The tender chicken, savory enchilada sauce, and melted cheese create a symphony of tastes that will dance on your palate. The sour cream and cilantro add a refreshing touch that balances the richness of the casserole.

A Versatile Dish:

This casserole is not only delicious but also incredibly versatile. It can be served as a main course, a side dish, or even an appetizer. It’s perfect for potlucks, parties, or family gatherings. You can also customize it to your liking by adding or removing ingredients.

A Culinary Adventure:

Preparing Mexican Chicken Enchilada Casserole is a culinary adventure that will transport you to the vibrant streets of Mexico. The aromas of spices and the sizzling of the chicken will fill your kitchen with an irresistible allure. As you assemble the casserole, you’ll feel like a master chef creating a culinary masterpiece.

Conclusion:

Indulge in the tantalizing flavors of Mexican Chicken Enchilada Casserole and embark on a culinary adventure that will leave you craving more. This delectable dish is a symphony of tastes and textures that will delight your senses and transport you to the heart of Mexico. Whether you’re a seasoned cook or a novice in the kitchen, this casserole is sure to impress. So gather your ingredients, fire up your oven, and prepare to savor a culinary masterpiece that will become a staple in your recipe book.

Share:

Recipes Ratatouille Stuffed Bell Peppers

Ratatouille Stuffed Bell Peppers: A Culinary Symphony of Flavors

Introduction

Ratatouille, a classic French dish, is a vibrant and flavorful stew featuring a medley of summer vegetables. When combined with the earthy sweetness of bell peppers, this dish transforms into a culinary masterpiece that tantalizes the taste buds and nourishes the body. This article presents a comprehensive guide to creating exquisite Ratatouille Stuffed Bell Peppers, providing step-by-step instructions and exploring the nuances of this delectable dish.

Ingredients:

For the Ratatouille:

  • 1 large eggplant, diced
  • 2 medium zucchini, diced
  • 2 bell peppers (any color), diced
  • 1 large onion, chopped
  • 4 cloves garlic, minced
  • 1 (28-ounce) can crushed tomatoes
  • 1 cup vegetable broth
  • 1 tablespoon dried oregano
  • 1 teaspoon dried thyme
  • Salt and pepper to taste

For the Bell Peppers:

  • 6 large bell peppers (any color)
  • 1/2 cup grated Parmesan cheese
  • 1/4 cup bread crumbs
  • 1 egg, beaten
  • 1/4 cup olive oil

Instructions:

Preparing the Ratatouille:

  1. Sauté the vegetables: Heat a large skillet over medium heat. Add the onion and garlic and sauté until softened, about 5 minutes.
  2. Add the eggplant and zucchini: Stir in the diced eggplant and zucchini and cook until they begin to soften, about 10 minutes.
  3. Incorporate the bell peppers: Add the diced bell peppers and cook for an additional 5 minutes.
  4. Add the tomatoes and broth: Pour in the crushed tomatoes and vegetable broth. Season with oregano, thyme, salt, and pepper.
  5. Simmer: Bring the mixture to a boil, then reduce heat to low and simmer for 30 minutes, or until the vegetables are tender and the sauce has thickened.

Preparing the Bell Peppers:

  1. Cut the bell peppers: Cut the bell peppers in half lengthwise and remove the seeds and ribs.
  2. Mix the stuffing: In a large bowl, combine the ratatouille, Parmesan cheese, bread crumbs, and egg. Mix well.
  3. Stuff the bell peppers: Fill the bell pepper halves with the ratatouille mixture, pressing down gently to pack it in.
  4. Drizzle with olive oil: Drizzle the bell peppers with olive oil.

Baking:

  1. Preheat the oven: Preheat the oven to 375°F (190°C).
  2. Bake: Place the stuffed bell peppers in a baking dish and bake for 30-45 minutes, or until the bell peppers are tender and the filling is bubbling.
  3. Serve: Serve the Ratatouille Stuffed Bell Peppers hot, garnished with fresh herbs such as basil or parsley.

Variations:

  • Add meat: For a heartier dish, brown some ground beef or turkey and add it to the ratatouille mixture.
  • Use different vegetables: Experiment with other summer vegetables such as carrots, celery, or mushrooms in the ratatouille.
  • Make it spicy: Add a pinch of cayenne pepper or chili flakes to the ratatouille for a touch of heat.
  • Top with cheese: Before baking, sprinkle the stuffed bell peppers with additional Parmesan cheese or mozzarella for a crispy topping.

Tips:

  • For a more intense flavor, roast the eggplant, zucchini, and bell peppers before adding them to the ratatouille.
  • Allow the ratatouille to cool slightly before stuffing the bell peppers to prevent the peppers from tearing.
  • Use a variety of colored bell peppers for a visually appealing dish.
  • Serve the Ratatouille Stuffed Bell Peppers with a side of crusty bread or rice to soak up the delicious sauce.

Nutritional Benefits:

Ratatouille Stuffed Bell Peppers is a nutrient-rich dish that offers a wide range of health benefits:

  • Rich in antioxidants: The vegetables in ratatouille are packed with antioxidants that protect the body from free radical damage.
  • High in fiber: The bell peppers and vegetables provide dietary fiber, which promotes digestive health and satiety.
  • Low in calories: This dish is relatively low in calories, making it a healthy option for weight management.
  • Good source of vitamins and minerals: Ratatouille is a good source of vitamins A, C, and K, as well as potassium, magnesium, and iron.

Conclusion:

Ratatouille Stuffed Bell Peppers is a culinary masterpiece that combines the vibrant flavors of summer vegetables with the earthy sweetness of bell peppers. This dish is not only delicious but also nutritious, offering a wide range of health benefits. By following the step-by-step instructions and exploring the variations and tips provided in this article, you can create an exquisite meal that will impress your family and friends. So, gather your ingredients, preheat your oven, and embark on a culinary journey that will tantalize your taste buds and nourish your body.

Share:

Recipes Lemon Herb Grilled Shrimp

Lemon Herb Grilled Shrimp: A Culinary Delight for Seafood Enthusiasts

Grilled shrimp is a versatile and delectable dish that can tantalize taste buds and elevate any meal. Infused with the vibrant flavors of lemon and aromatic herbs, this recipe transforms ordinary shrimp into an extraordinary culinary experience.

Ingredients:

  • 1 pound large shrimp, peeled and deveined
  • 1/4 cup olive oil
  • 1/4 cup lemon juice (from 2 lemons)
  • 1 tablespoon minced garlic
  • 1 tablespoon chopped fresh parsley
  • 1 tablespoon chopped fresh basil
  • 1 teaspoon dried oregano
  • 1/2 teaspoon salt
  • 1/4 teaspoon black pepper

Instructions:

1. Marinate the Shrimp:

In a large bowl, combine the shrimp, olive oil, lemon juice, garlic, parsley, basil, oregano, salt, and pepper. Stir well to ensure the shrimp is evenly coated. Cover the bowl and refrigerate for at least 30 minutes, or up to overnight.

2. Prepare the Grill:

Preheat your grill to medium-high heat. If using a charcoal grill, wait until the coals are white-hot and glowing.

3. Grill the Shrimp:

Remove the shrimp from the marinade and discard any excess liquid. Thread the shrimp onto skewers or place them directly on the grill grate. Grill for 2-3 minutes per side, or until the shrimp are cooked through and slightly charred.

4. Serve Immediately:

Transfer the grilled shrimp to a serving platter and serve immediately with your favorite dipping sauce, such as lemon wedges, melted butter, or a creamy dill sauce.

Tips for Perfect Grilled Shrimp:

  • Use large shrimp: Large shrimp will grill more evenly and stay juicy.
  • Don’t overcook: Overcooked shrimp will become tough and rubbery. Cook them just until they are opaque and slightly curled.
  • Use a marinade: Marinating the shrimp in a flavorful mixture will enhance their taste and tenderness.
  • Grill over high heat: High heat will sear the shrimp quickly, creating a delicious char.
  • Don’t crowd the grill: Overcrowding the grill will prevent the shrimp from cooking evenly.
  • Serve immediately: Grilled shrimp is best served fresh off the grill.

Variations:

  • Spicy: Add a pinch of cayenne pepper or red pepper flakes to the marinade for a spicy kick.
  • Herby: Add additional fresh herbs, such as thyme, rosemary, or cilantro, to the marinade for a more aromatic flavor.
  • Citrusy: Use a combination of lemon and lime juice in the marinade for a brighter, citrusy flavor.
  • Grilled Lemon Wedges: Grill lemon wedges alongside the shrimp for a burst of fresh lemon flavor.

Accompaniments:

  • Grilled Vegetables: Grilled vegetables, such as zucchini, bell peppers, or onions, make a delicious and healthy side dish for grilled shrimp.
  • Lemon Rice: Serve grilled shrimp over a bed of fluffy lemon rice for a tangy and satisfying meal.
  • Grilled Corn on the Cob: Grilled corn on the cob is a classic summer side dish that pairs perfectly with grilled shrimp.
  • Dipping Sauces: Offer a variety of dipping sauces, such as lemon wedges, melted butter, or a creamy dill sauce, to complement the shrimp.

Nutritional Information:

One serving (4 ounces) of grilled lemon herb shrimp contains approximately:

  • Calories: 120
  • Protein: 20 grams
  • Fat: 5 grams
  • Carbohydrates: 0 grams

Conclusion:

Lemon herb grilled shrimp is an easy-to-make and flavorful dish that is sure to impress your guests. Whether you are grilling for a casual backyard gathering or a special occasion, this recipe will provide you with a delicious and satisfying meal. So fire up your grill and indulge in the tantalizing flavors of this culinary delight.

Share:

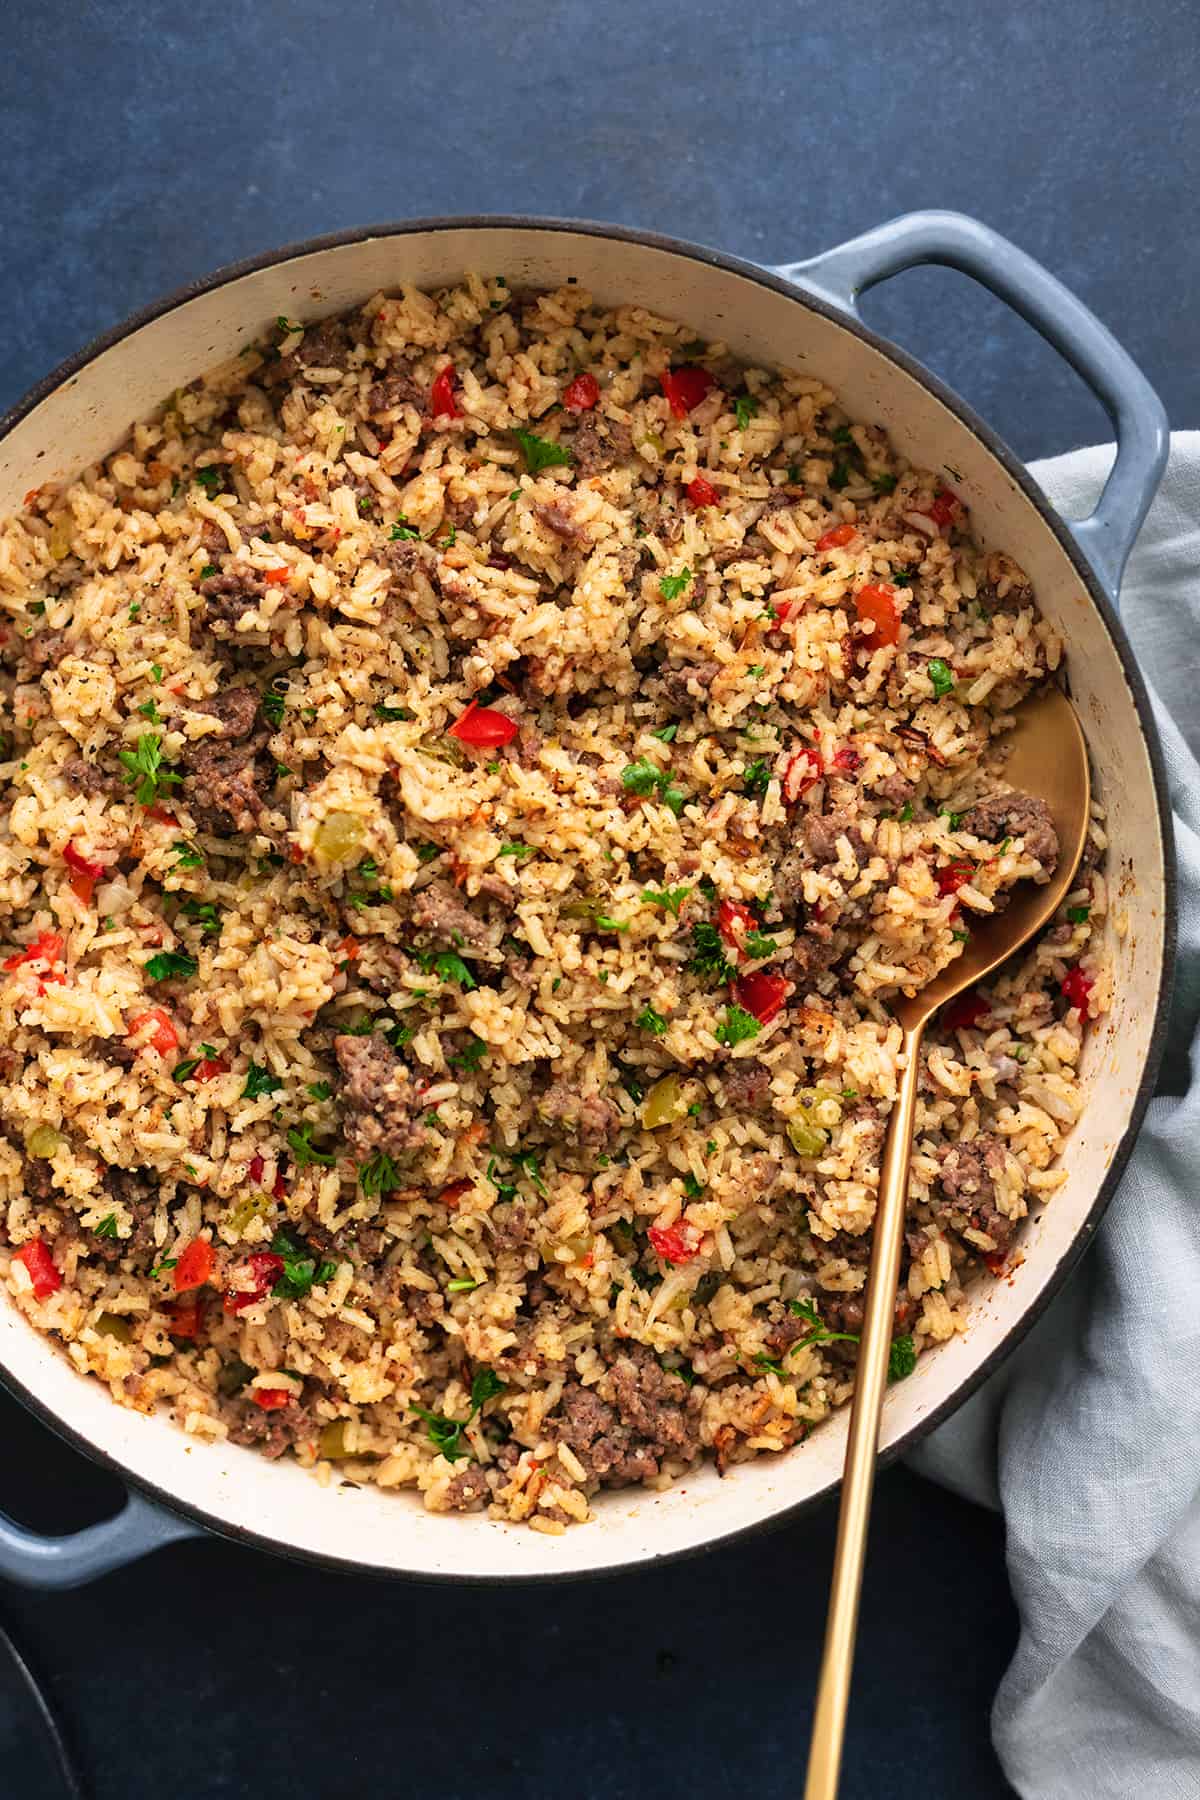
Recipes Cajun Dirty Rice

Indulge in the Bold Flavors of Cajun Dirty Rice

Cajun dirty rice, a beloved dish hailing from the vibrant culinary landscape of Louisiana, captivates taste buds with its tantalizing blend of aromatic spices, tender rice, and savory meat. This hearty and flavorful dish is a testament to the rich cultural heritage of the Cajun people and has become a staple in both Cajun homes and restaurants worldwide.

Origins and History

The origins of Cajun dirty rice can be traced back to the 18th century, when French settlers arrived in Louisiana and encountered the indigenous Native American tribes. Over time, a unique fusion of French and Spanish culinary traditions emerged, giving birth to the distinctive Cajun cuisine that we know today.

Dirty rice is believed to have originated as a way to utilize leftover rice and meat. By adding flavorful ingredients such as the "holy trinity" of onions, celery, and bell peppers, as well as aromatic spices like thyme, bay leaves, and cayenne pepper, cooks transformed simple leftovers into a delectable dish.

Ingredients and Variations

The core ingredients of Cajun dirty rice include:

  • Rice: Long-grain white rice is traditionally used, but brown rice or other varieties can also be substituted.
  • Meat: Ground beef, pork, or chicken are common choices, but other meats such as sausage or seafood can be used.
  • Holy Trinity: Onions, celery, and bell peppers form the aromatic base of the dish.
  • Spices: Thyme, bay leaves, cayenne pepper, and paprika add depth of flavor.
  • Stock: Chicken or beef stock provides moisture and enhances the overall taste.

Variations of Cajun dirty rice abound, reflecting the diverse culinary traditions of different regions. Some popular variations include:

  • Seafood Dirty Rice: Incorporates shrimp, crawfish, or crabmeat.
  • Vegetarian Dirty Rice: Uses vegetable broth and omits the meat.
  • Jambalaya Dirty Rice: Combines elements of both dirty rice and jambalaya, with the addition of tomatoes and okra.

Cooking Methods

Cajun dirty rice can be prepared in various ways, including:

  • Stovetop: The traditional method involves cooking the rice, meat, and vegetables in a large skillet or Dutch oven.
  • Oven: The dish can be baked in the oven, allowing for a more hands-off approach.
  • Instant Pot: This modern appliance simplifies the cooking process by combining all ingredients in one pot.

Serving Suggestions

Cajun dirty rice is a versatile dish that can be enjoyed as a main course or side dish. It pairs well with grilled meats, fried chicken, or seafood. To enhance the flavors, serve with a dollop of Creole mustard or hot sauce.

Health Benefits

While Cajun dirty rice is not necessarily considered a health food, it does offer some nutritional benefits:

  • Whole Grains: Long-grain white rice provides a source of complex carbohydrates and fiber.
  • Vegetables: The holy trinity provides essential vitamins and minerals.
  • Protein: The meat provides essential amino acids.
  • Antioxidants: Spices like thyme and cayenne pepper contain antioxidants that may protect against chronic diseases.

Tips for Making the Perfect Cajun Dirty Rice

  • Use flavorful stock: Rich chicken or beef stock enhances the overall taste.
  • Sauté the holy trinity: Allow the onions, celery, and bell peppers to caramelize for maximum flavor.
  • Season generously: Don’t be afraid to add plenty of spices to create a bold and aromatic dish.
  • Cook the rice thoroughly: Ensure that the rice is cooked through but not mushy.
  • Let the dish rest: Allow the dirty rice to rest for a few minutes before serving, which allows the flavors to meld.

Conclusion

Cajun dirty rice is a culinary masterpiece that embodies the vibrant spirit of Louisiana. Its bold flavors, aromatic spices, and tender rice make it a dish that is both satisfying and memorable. Whether enjoyed as a main course or side dish, Cajun dirty rice is a testament to the rich cultural heritage of the Cajun people and a dish that continues to captivate taste buds around the world.

Share:

Hazelnut Delicacy: Experience The Luxury Of Charlottes Hazelnut Olive Oil Cake

Hazelnut Delicacy: Experience The Luxury Of Charlottes Hazelnut Olive Oil Cake

Hazelnut Delicacy: Experience the Luxury of Charlottes Hazelnut Olive Oil Cake

Ingredients:

* 1 1/2 cups all-purpose flour, plus more for dusting the pan
* 1 cup granulated sugar
* 1/2 cup packed light brown sugar
* 1/2 cup Charlottes Hazelnut Olive Oil, divided
* 2 large eggs
* 1 large egg yolk

Instructions:

1. Preheat oven to 350 degrees F (175 degrees C). Grease and flour a 9-inch round cake pan; set aside.
2. In a medium bowl, whisk together the flour, baking powder, baking soda, and salt. Set aside.
3. In the bowl of a stand mixer fitted with the paddle attachment, beat together the granulated sugar, brown sugar, and 1/2 cup of the Charlottes Hazelnut Olive Oil until light and fluffy, about 2 minutes. Add the eggs and egg yolk, one at a time, beating well after each addition. Stir in the vanilla.
5. Pour the batter into the prepared cake pan and bake in the preheated oven for 45-50 minutes, or until a toothpick inserted into the center comes out clean.
6. Let the cake cool in the pan for 10 minutes before inverting it onto a wire rack to cool completely.

Decoration:

Serving Suggestions:

Slice the cake and serve it with a dollop of whipped cream or a scoop of vanilla ice cream. For an extra touch of hazelnut flavor, drizzle some Charlottes Hazelnut Olive Oil over each slice before serving.

Tips:

* To toast the hazelnuts, spread them in a single layer on a baking sheet and bake in a preheated 350 degrees F (175 degrees C) oven for 10-12 minutes, or until lightly browned and fragrant.
* Store the cake at room temperature for up to 3 days, or in the refrigerator for up to 5 days.

Share:

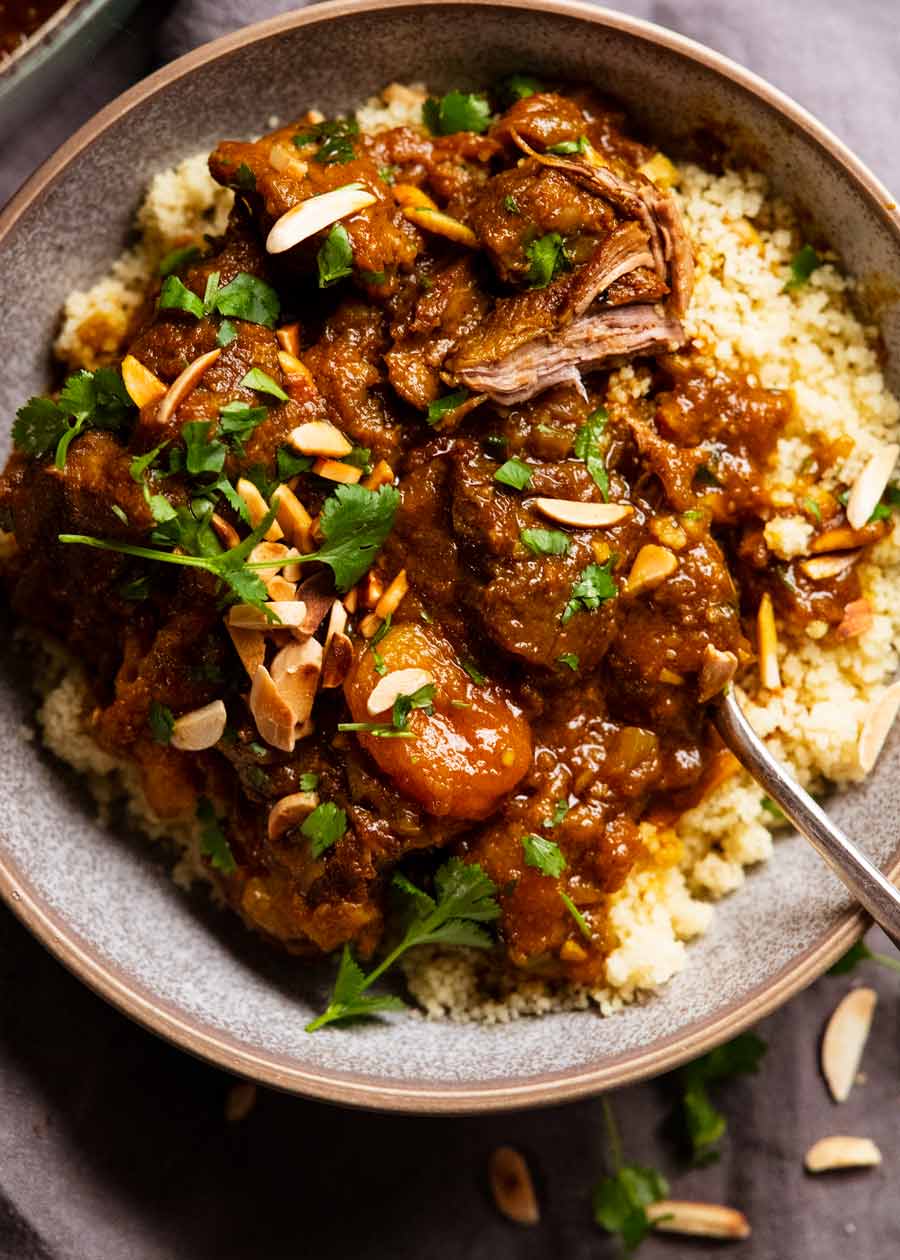
Recipes Moroccan Lamb Tagine

Moroccan Lamb Tagine: A Culinary Journey to the Heart of North Africa

In the vibrant tapestry of North African cuisine, the Moroccan lamb tagine reigns supreme. This aromatic and flavorful dish is a testament to the rich culinary heritage of Morocco, where the mingling of spices, herbs, and tender lamb creates a symphony of flavors that tantalizes the taste buds.

Origins and Cultural Significance

The tagine, a conical-shaped earthenware cooking vessel, is the namesake of this beloved dish. Its origins can be traced back to the Berber tribes of North Africa, who used it to cook slow-simmered stews over an open fire. Over time, the tagine became a staple in Moroccan households, where it is used to prepare a wide variety of dishes, including the iconic lamb tagine.

Ingredients and Preparation

The essence of a Moroccan lamb tagine lies in its carefully selected ingredients and meticulous preparation. The main protagonist is, of course, lamb, typically cut into large chunks and seasoned with a vibrant blend of spices. These spices include cumin, coriander, turmeric, paprika, and saffron, which impart a warm and earthy flavor to the meat.

In addition to the lamb, the tagine includes a medley of vegetables that add texture, color, and sweetness. Carrots, onions, and potatoes are common additions, along with dried apricots or raisins for a touch of fruity sweetness. The vegetables are sautéed in olive oil until caramelized, then added to the tagine along with the lamb.

The key to a flavorful tagine is the slow-simmering process. The lamb and vegetables are cooked over low heat for several hours, allowing the spices and flavors to meld and penetrate the meat. As the tagine simmers, it releases a heady aroma that permeates the kitchen, creating an irresistible invitation to dine.

Serving and Accompaniments

Traditionally, Moroccan lamb tagine is served directly from the tagine vessel, placed in the center of the table for communal dining. It is accompanied by couscous, a fluffy semolina dish that serves as a perfect accompaniment to the rich and flavorful tagine.

Other popular accompaniments include khobz, a Moroccan flatbread, and pickled vegetables such as olives, lemons, and carrots. These accompaniments provide a refreshing contrast to the hearty tagine and help balance the flavors.

Variations and Regional Influences

While the classic Moroccan lamb tagine is a beloved dish throughout the country, there are regional variations that reflect the diverse culinary traditions of Morocco. In the northern regions, the tagine may include green olives and preserved lemons, while in the southern regions, it is often flavored with harissa, a spicy chili paste.

Some variations also incorporate different types of meat, such as chicken, beef, or goat. The vegetables used may also vary depending on the season and availability of produce.

Health Benefits

Beyond its culinary delights, Moroccan lamb tagine offers a range of health benefits. Lamb is a good source of protein, iron, and zinc, while the vegetables provide essential vitamins and minerals. The spices used in the tagine, such as cumin and turmeric, have antioxidant and anti-inflammatory properties.

Cultural and Social Significance

In Moroccan culture, the lamb tagine holds a special place. It is often served at important occasions such as weddings, festivals, and family gatherings. The communal dining experience associated with the tagine fosters a sense of togetherness and strengthens family bonds.

Conclusion

Moroccan lamb tagine is a culinary masterpiece that embodies the rich flavors and traditions of North Africa. Its tender lamb, aromatic spices, and vibrant vegetables create a symphony of flavors that is both comforting and exotic. Whether enjoyed as a special occasion dish or as a comforting meal on a cold evening, the Moroccan lamb tagine is a culinary journey that will transport you to the heart of North African cuisine.

Recipe for Moroccan Lamb Tagine

Ingredients:

  • 2 pounds boneless lamb shoulder, cut into 1-inch chunks
  • 1 large onion, chopped
  • 2 carrots, peeled and chopped
  • 2 potatoes, peeled and chopped
  • 1/2 cup dried apricots or raisins
  • 1 tablespoon olive oil
  • 1 teaspoon ground cumin
  • 1 teaspoon ground coriander
  • 1 teaspoon ground turmeric
  • 1/2 teaspoon paprika
  • 1/4 teaspoon saffron threads (optional)
  • 1/4 cup chopped fresh cilantro
  • Salt and pepper to taste

Instructions:

  1. In a large skillet, heat the olive oil over medium heat. Add the lamb and brown on all sides.
  2. Transfer the lamb to a tagine or Dutch oven. Add the onion, carrots, potatoes, apricots, cumin, coriander, turmeric, paprika, and saffron (if using). Season with salt and pepper to taste.
  3. Add enough water to cover the lamb and vegetables by about 1 inch. Bring to a boil, then reduce heat to low and simmer for 2-3 hours, or until the lamb is tender and the vegetables are cooked through.
  4. Stir in the cilantro and serve hot with couscous or bread.

Tips:

  • For a richer flavor, marinate the lamb in the spices overnight before cooking.
  • If you don’t have a tagine, you can use a Dutch oven or a large pot with a lid.
  • Serve the tagine with a dollop of yogurt or harissa for an extra layer of flavor.
  • Leftover tagine can be stored in the refrigerator for up to 3 days.
Share:

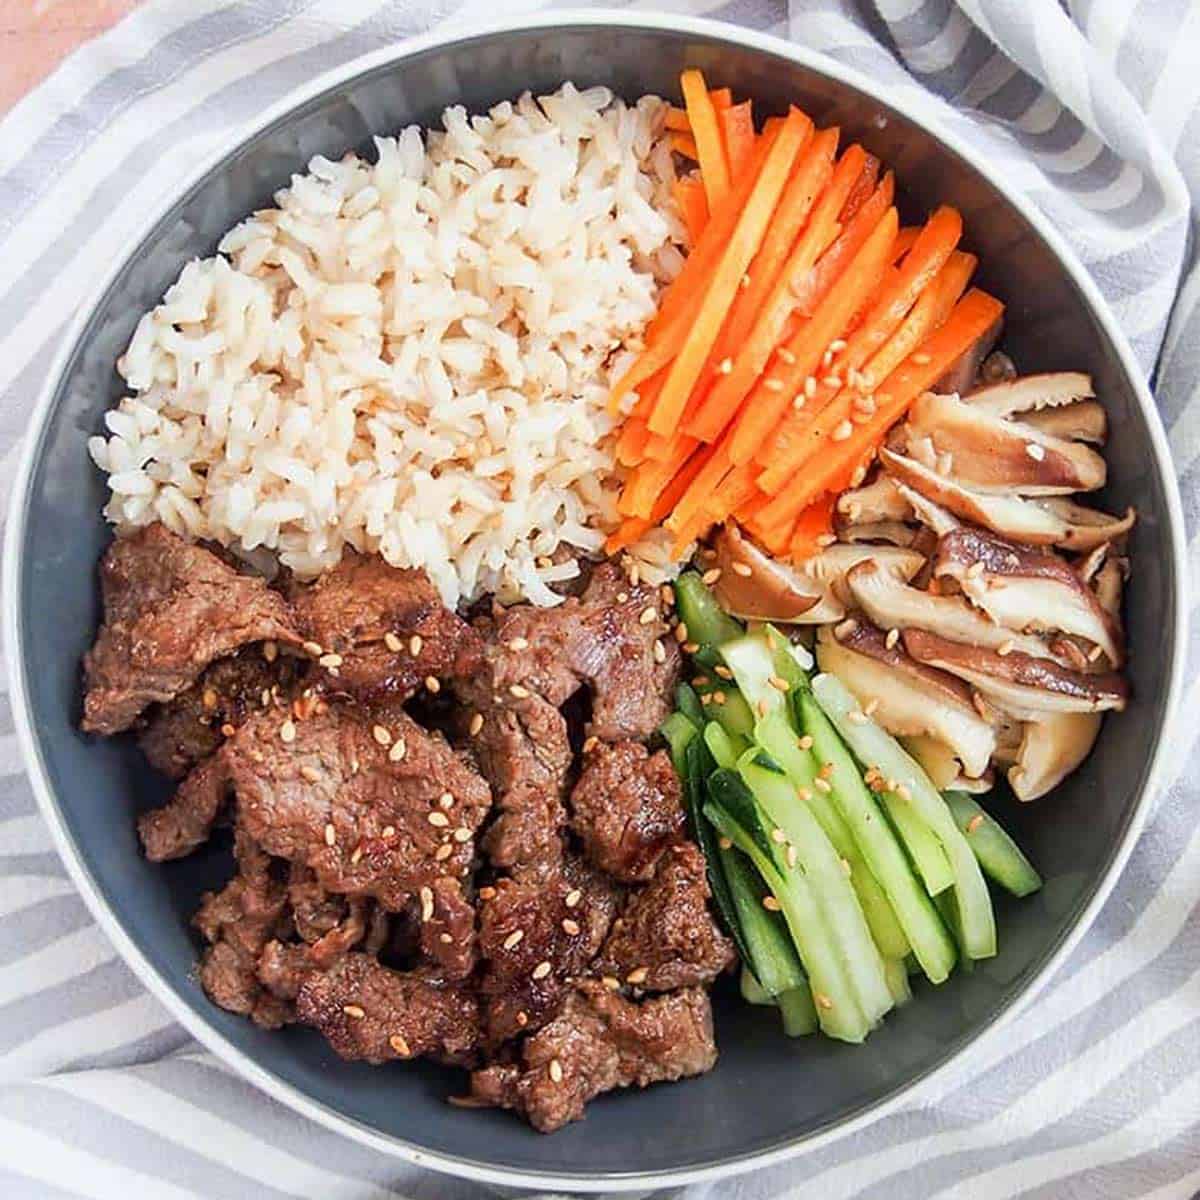
Recipes Beef Bulgogi Bowls

Beef Bulgogi Bowls: A Culinary Journey into Korean Delights

In the realm of Korean cuisine, beef bulgogi stands as a culinary masterpiece, tantalizing taste buds with its savory, sweet, and slightly spicy flavors. Originating from the Korean word "bul" (fire) and "gogi" (meat), bulgogi translates to "fire meat," aptly describing the traditional method of cooking thinly sliced beef over an open flame.

Today, beef bulgogi has evolved into a versatile dish, enjoyed in various forms, including the delectable beef bulgogi bowl. This dish combines the succulent flavors of bulgogi with a medley of fresh vegetables, aromatic rice, and a vibrant sauce, creating a symphony of textures and flavors that will leave you craving for more.
Ingredients for Beef Bulgogi Bowls:

For the Bulgogi:

  • 1 pound flank steak, thinly sliced against the grain
  • 1/2 cup soy sauce
  • 1/4 cup brown sugar
  • 1/4 cup sesame oil
  • 2 tablespoons minced garlic
  • 2 tablespoons minced ginger
  • 1 tablespoon gochujang (Korean chili paste)
  • 1 teaspoon black pepper
  • 1/2 teaspoon sesame seeds

For the Rice:

  • 2 cups short-grain white rice
  • 2 1/4 cups water

For the Vegetables:

  • 1 cup shredded carrots
  • 1 cup shredded cucumber
  • 1/2 cup thinly sliced red onion
  • 1/2 cup bean sprouts

For the Sauce:

  • 1/4 cup soy sauce
  • 1/4 cup rice vinegar
  • 1 tablespoon sesame oil
  • 1 teaspoon honey
  • 1/2 teaspoon minced garlic
  • 1/2 teaspoon sesame seeds

Instructions:

For the Bulgogi:

  1. In a large bowl, combine the flank steak, soy sauce, brown sugar, sesame oil, garlic, ginger, gochujang, black pepper, and sesame seeds.
  2. Mix well to ensure the steak is evenly coated.
  3. Cover the bowl and refrigerate for at least 30 minutes, or up to overnight.

For the Rice:

  1. Rinse the rice thoroughly under cold water until the water runs clear.
  2. In a medium saucepan, combine the rice and water.
  3. Bring to a boil over high heat.
  4. Reduce heat to low, cover, and simmer for 18-20 minutes, or until all the water has been absorbed.

For the Vegetables:

  1. Shred the carrots and cucumber using a grater or mandoline.
  2. Thinly slice the red onion.
  3. Rinse the bean sprouts.

For the Sauce:

  1. In a small bowl, whisk together the soy sauce, rice vinegar, sesame oil, honey, garlic, and sesame seeds.

To Assemble the Bowls:

  1. Divide the cooked rice among four bowls.
  2. Top with the marinated bulgogi.
  3. Arrange the shredded carrots, cucumber, red onion, and bean sprouts around the bulgogi.
  4. Drizzle the sauce over the bowls.
  5. Garnish with additional sesame seeds, if desired.

Tips:

  • For a richer flavor, use a high-quality soy sauce.
  • If you don’t have gochujang, you can substitute with Sriracha or another Korean chili paste.
  • Adjust the amount of gochujang to your desired level of spiciness.
  • If you don’t have time to marinate the steak overnight, let it marinate for at least 30 minutes before cooking.
  • For a more authentic experience, serve the bulgogi bowls with a side of kimchi, a fermented Korean cabbage dish.

Variations:

  • Add other vegetables to your bowls, such as shredded zucchini, bell peppers, or mushrooms.
  • Top the bowls with a fried egg for an extra protein boost.
  • For a vegetarian version, substitute the beef with tofu or tempeh.
  • Serve the bowls with a side of steamed rice or noodles.

Conclusion:

Beef bulgogi bowls are a culinary delight that seamlessly blend the savory flavors of Korean barbecue with the freshness of vegetables and the comforting warmth of rice. Whether you’re a seasoned Korean food enthusiast or a curious explorer, these bowls offer an unforgettable taste experience that will tantalize your taste buds and leave you yearning for more. So gather your ingredients, fire up your stove, and embark on a culinary journey into the vibrant world of Korean cuisine with these delectable beef bulgogi bowls.

Share:

Recipes Mexican Chicken Tortilla Casserole

Mexican Chicken Tortilla Casserole: A Culinary Symphony of Flavors

Indulge in the tantalizing flavors of Mexico with this delectable Mexican Chicken Tortilla Casserole. This dish is a symphony of textures and tastes, featuring tender chicken, crispy tortillas, and a rich, flavorful sauce. Whether you’re hosting a fiesta or simply craving a comforting meal, this casserole is sure to impress.

Ingredients:

For the Chicken:

  • 1 pound boneless, skinless chicken breasts
  • 1 tablespoon olive oil
  • 1 teaspoon chili powder
  • 1/2 teaspoon cumin
  • 1/4 teaspoon salt
  • 1/4 teaspoon black pepper

For the Sauce:

  • 1 (10.75 ounce) can condensed cream of chicken soup
  • 1 (10 ounce) can diced tomatoes with green chilies, undrained
  • 1 (15 ounce) can black beans, rinsed and drained
  • 1 (15 ounce) can corn, drained
  • 1 (4 ounce) can chopped green chilies, undrained
  • 1/2 cup chopped onion
  • 1/2 cup chopped bell pepper
  • 1 teaspoon chili powder
  • 1/2 teaspoon cumin
  • 1/4 teaspoon salt
  • 1/4 teaspoon black pepper

For the Casserole:

  • 12 (6-inch) corn tortillas
  • 1 cup shredded cheddar cheese
  • 1/2 cup shredded Monterey Jack cheese

Instructions:

Prepare the Chicken:

  1. Preheat oven to 350°F (175°C).
  2. In a large skillet, heat olive oil over medium heat.
  3. Season chicken breasts with chili powder, cumin, salt, and black pepper.
  4. Add chicken to the skillet and cook until golden brown on both sides, about 5 minutes per side.
  5. Remove chicken from the skillet and shred or cut into bite-sized pieces.

Make the Sauce:

  1. In a large bowl, combine cream of chicken soup, diced tomatoes, black beans, corn, green chilies, onion, bell pepper, chili powder, cumin, salt, and black pepper.
  2. Stir until well combined.

Assemble the Casserole:

  1. Spread half of the sauce in the bottom of a 9×13 inch baking dish.
  2. Layer 6 tortillas over the sauce.
  3. Top with half of the shredded chicken.
  4. Spread the remaining sauce over the chicken.
  5. Layer the remaining 6 tortillas over the sauce.
  6. Top with shredded cheddar cheese and Monterey Jack cheese.

Bake:

  1. Bake in the preheated oven for 30-35 minutes, or until the casserole is bubbly and the cheese is melted and golden brown.
  2. Let stand for 10 minutes before serving.

Tips:

  • For a spicier casserole, add an extra teaspoon of chili powder or chopped jalapeños.
  • If you don’t have corn tortillas, you can use flour tortillas instead.
  • To make the casserole ahead of time, assemble it and refrigerate for up to 24 hours. When ready to serve, bake as directed.
  • Serve the casserole with your favorite toppings, such as sour cream, guacamole, salsa, or shredded lettuce.

Variations:

  • Chicken Taco Casserole: Use ground beef or turkey instead of chicken.
  • Vegetarian Tortilla Casserole: Omit the chicken and add extra beans, corn, and vegetables.
  • Enchilada Casserole: Add enchilada sauce to the sauce mixture.
  • Loaded Tortilla Casserole: Top the casserole with your favorite toppings, such as bacon, avocado, or shredded cheese.

Conclusion:

Mexican Chicken Tortilla Casserole is a versatile and delicious dish that will satisfy your cravings for Mexican flavors. With its tender chicken, crispy tortillas, and flavorful sauce, this casserole is a culinary masterpiece that will be enjoyed by all. Whether you’re a seasoned cook or a beginner in the kitchen, this recipe is easy to follow and will yield a mouthwatering meal that will impress your family and friends. So, gather your ingredients, preheat your oven, and embark on a culinary journey to Mexico with this tantalizing Mexican Chicken Tortilla Casserole.

Share:

Recipes Cajun Chicken And Sausage Pasta

Cajun Chicken and Sausage Pasta: A Flavorful and Satisfying Dish

Introduction

Cajun cuisine, originating from the southern region of Louisiana, is renowned for its bold flavors and use of aromatic spices. This Cajun Chicken and Sausage Pasta dish seamlessly blends the essence of Cajun cooking with the comforting indulgence of pasta, creating a tantalizing culinary experience that will captivate your taste buds.

Ingredients

For the Cajun Seasoning:

  • 1 tablespoon paprika
  • 1 tablespoon garlic powder
  • 1 tablespoon onion powder
  • 1 tablespoon dried oregano
  • 1 tablespoon dried thyme
  • 1 teaspoon cayenne pepper
  • 1 teaspoon black pepper
  • 1 teaspoon salt

For the Pasta:

  • 1 pound penne pasta or your preferred pasta shape
  • 8 cups water
  • 1 tablespoon salt

For the Chicken and Sausage:

  • 1 pound boneless, skinless chicken breasts, cut into bite-sized pieces
  • 1 pound smoked sausage, sliced
  • 2 tablespoons olive oil

For the Sauce:

  • 2 tablespoons olive oil
  • 1 large onion, chopped
  • 2 cloves garlic, minced
  • 1 green bell pepper, chopped
  • 1 red bell pepper, chopped
  • 1 (15 ounce) can diced tomatoes
  • 1 (15 ounce) can tomato sauce
  • 1 (10 ounce) can diced tomatoes with green chilies
  • 1 cup chicken broth
  • 1/2 cup heavy cream
  • 1/4 cup chopped fresh parsley

Instructions

Preparing the Cajun Seasoning:

  1. In a small bowl, combine all the ingredients for the Cajun seasoning. Mix well and set aside.

Cooking the Pasta:

  1. In a large pot, bring 8 cups of salted water to a boil.
  2. Add the pasta and cook according to the package instructions.
  3. Drain the pasta and set it aside.

Cooking the Chicken and Sausage:

  1. Heat 2 tablespoons of olive oil in a large skillet over medium heat.
  2. Add the chicken and sausage and cook until browned on all sides.
  3. Remove the chicken and sausage from the skillet and set aside.

Making the Sauce:

  1. In the same skillet, add 2 tablespoons of olive oil.
  2. Add the onion and cook until softened.
  3. Add the garlic and cook for another minute.
  4. Add the green and red bell peppers and cook until tender.
  5. Stir in the diced tomatoes, tomato sauce, diced tomatoes with green chilies, chicken broth, and Cajun seasoning.
  6. Bring to a boil, then reduce heat and simmer for 15 minutes, or until the sauce has thickened.
  7. Stir in the heavy cream and parsley.

Combining the Ingredients:

  1. Add the cooked chicken and sausage back to the skillet with the sauce.
  2. Bring to a simmer and cook for 5 minutes, or until heated through.
  3. Add the cooked pasta to the skillet and stir to combine.

Serving:

  1. Serve the Cajun Chicken and Sausage Pasta immediately, garnished with additional parsley if desired.

Tips:

  • For a spicier dish, increase the amount of cayenne pepper in the Cajun seasoning.
  • If you don’t have smoked sausage, you can use regular sausage or kielbasa.
  • You can use any type of pasta you like, but penne, rotini, or rigatoni are all good choices.
  • If you don’t have heavy cream, you can use milk instead.
  • Serve the pasta with a side of crusty bread to soak up the flavorful sauce.

Conclusion

Cajun Chicken and Sausage Pasta is a delectable dish that embodies the vibrant flavors of Cajun cuisine. Its combination of tender chicken, savory sausage, and a rich, aromatic sauce creates a culinary masterpiece that will leave you craving for more. Whether you’re a seasoned cook or a novice in the kitchen, this recipe is easy to follow and will impress your family and friends with its tantalizing taste.
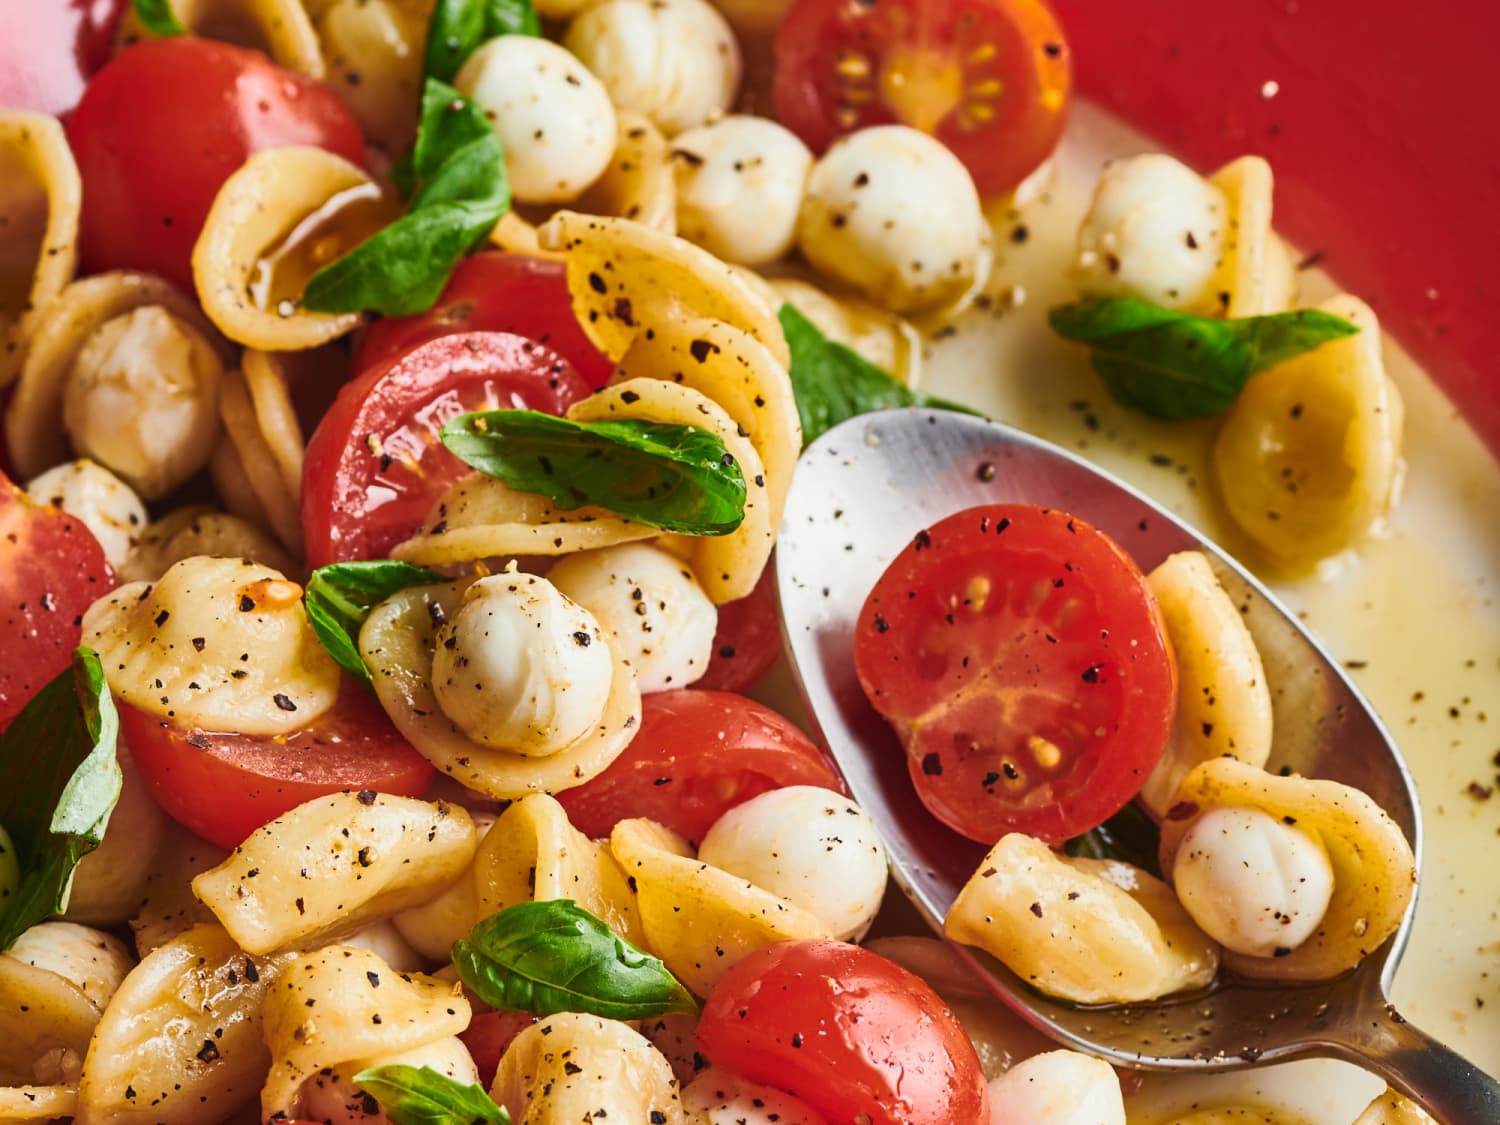
Share:

Recipes Thai Green Curry Chicken

Thai Green Curry Chicken: A Culinary Journey into the Heart of Thai Cuisine

Thai cuisine, renowned for its vibrant flavors and aromatic spices, has captivated the taste buds of food enthusiasts worldwide. Among its culinary gems, Thai green curry chicken stands as a testament to the country’s rich culinary heritage. This tantalizing dish combines the delicate flavors of fresh green chilies, fragrant herbs, and succulent chicken, creating a symphony of tastes that will leave you craving for more.
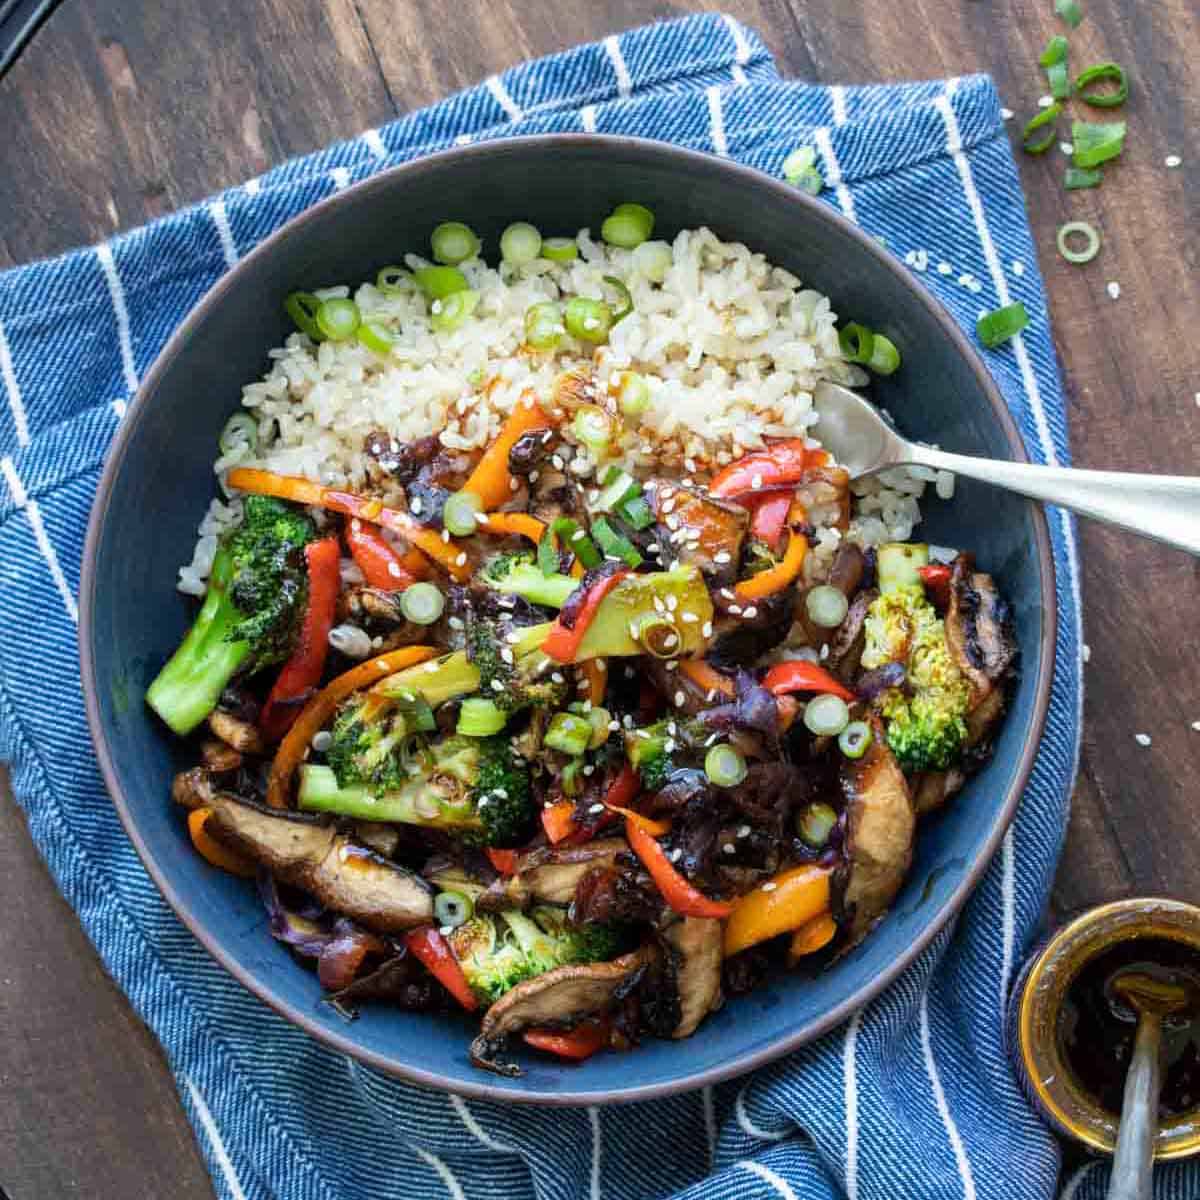
In this comprehensive guide, we will embark on a culinary adventure, exploring the origins, ingredients, and step-by-step instructions for preparing an authentic Thai green curry chicken. From sourcing the freshest ingredients to mastering the art of balancing flavors, we will guide you through every aspect of this culinary masterpiece.

Origins and History

Thai green curry, known locally as "Kaeng Khiao Wan Kai," has its roots in the northern region of Thailand. It is believed to have originated from the Lanna kingdom, which flourished in the 13th century. The dish gained popularity throughout the country and eventually became a beloved staple in Thai cuisine.

Ingredients: A Symphony of Flavors

The essence of Thai green curry lies in its harmonious blend of ingredients. Here is a detailed list of the essential components:

  • Chicken: Boneless, skinless chicken thighs or breasts are the preferred choice for this dish.
  • Green chilies: Fresh green chilies are the heart of the curry, providing a spicy yet balanced flavor.
  • Coconut milk: Rich and creamy coconut milk forms the base of the curry, adding a velvety texture and subtle sweetness.
  • Galangal: This aromatic root, similar to ginger, adds a unique earthy flavor to the curry.
  • Kaffir lime leaves: These fragrant leaves infuse the curry with a citrusy and slightly bitter note.
  • Lemongrass: The fresh, grassy flavor of lemongrass adds a refreshing touch to the dish.
  • Holy basil: This aromatic herb contributes a peppery and slightly minty flavor.
  • Fish sauce: A staple in Thai cooking, fish sauce adds a salty and umami flavor to the curry.
  • Sugar: A touch of sugar balances the spiciness of the chilies and enhances the overall flavor profile.

Step-by-Step Instructions: A Culinary Masterpiece

Now that we have gathered our ingredients, let’s embark on the culinary journey of preparing Thai green curry chicken:

1. Prepare the Paste:

  • In a blender or food processor, combine the green chilies, galangal, lemongrass, kaffir lime leaves, and holy basil.
  • Add a splash of coconut milk to help the ingredients blend smoothly.
  • Process until you obtain a fine paste.

2. Sauté the Paste:

  • Heat a large pot or wok over medium heat.
  • Add a drizzle of vegetable oil and sauté the prepared paste for 3-4 minutes, or until fragrant.

3. Add the Chicken:

  • Add the chicken to the pot and stir well to coat it with the paste.
  • Cook the chicken for 5-7 minutes, or until it is no longer pink.

4. Pour in the Coconut Milk:

  • Gradually add the coconut milk to the pot, stirring constantly.
  • Bring the mixture to a simmer and cook for 15-20 minutes, or until the chicken is tender and the curry has thickened.

5. Season to Taste:

  • Add fish sauce, sugar, and additional green chilies (if desired) to taste.
  • Adjust the seasonings until you achieve the desired balance of flavors.

6. Garnish and Serve:

  • Once the curry is cooked, remove it from the heat and garnish with fresh holy basil leaves.
  • Serve the Thai green curry chicken hot with steamed rice or your preferred accompaniment.

Tips for Perfection:

  • Use fresh ingredients: The quality of your ingredients will significantly impact the flavor of the curry. Opt for fresh green chilies, fragrant herbs, and tender chicken.
  • Balance the flavors: Thai green curry is a delicate balance of spicy, sweet, sour, and salty flavors. Adjust the seasonings gradually to achieve the perfect harmony.
  • Don’t overcook the chicken: Overcooked chicken can become dry and tough. Cook it just until it is tender and juicy.
  • Serve with your favorite accompaniments: Thai green curry chicken pairs well with steamed rice, noodles, or even a side of fresh vegetables.

Variations and Adaptations:

  • Vegetable Green Curry: For a vegetarian version, replace the chicken with your favorite vegetables, such as bell peppers, carrots, or mushrooms.
  • Red Green Curry: Add a few dried red chilies to the paste for a spicier and more vibrant red hue.
  • Yellow Green Curry: Substitute green chilies with yellow chilies for a milder and sweeter flavor profile.

Conclusion

Thai green curry chicken is a culinary masterpiece that embodies the vibrant flavors and aromatic spices of Thai cuisine. By following the detailed instructions and tips provided in this guide, you can recreate this authentic dish in the comfort of your own home. Whether you are a seasoned chef or a culinary novice, the journey of preparing Thai green curry chicken is a rewarding experience that will tantalize your taste buds and leave you craving for more.
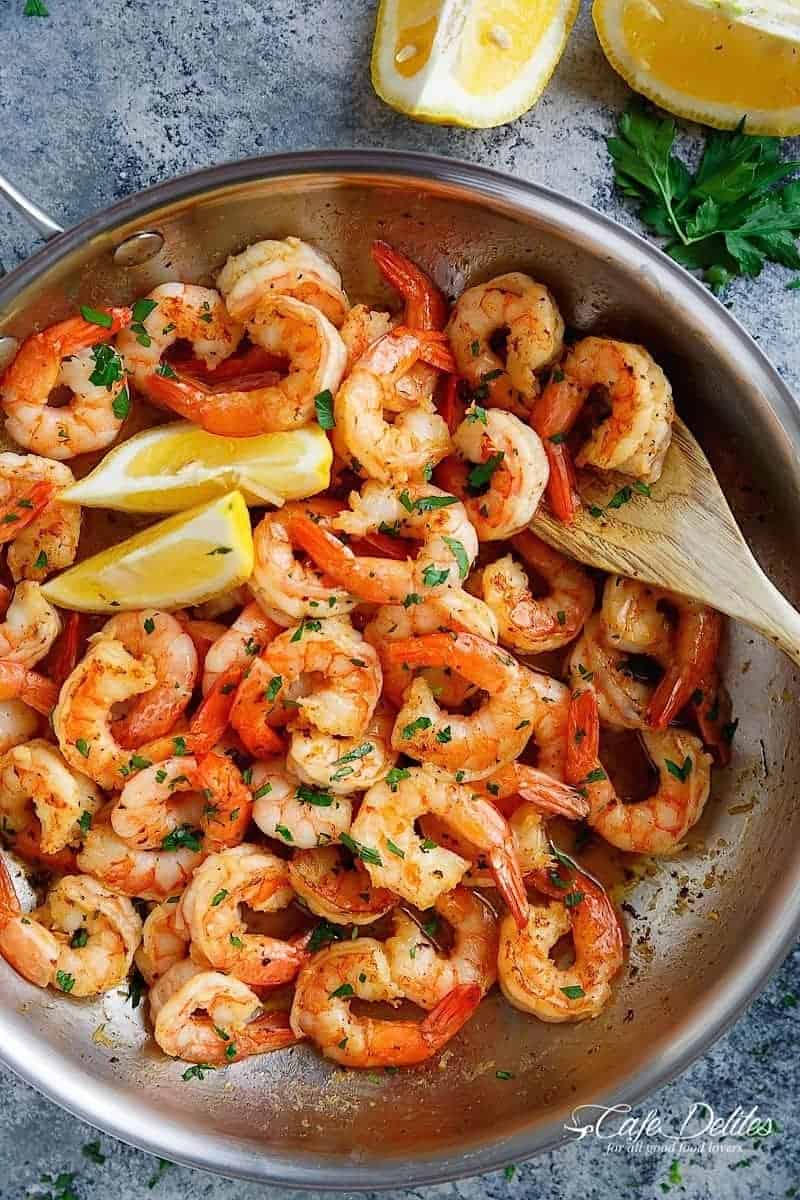
Share:

Popular Recipes

Labels

Blog Archive

Featured Post

Recipes Snow Fungus Soup

Snow Fungus Soup, also known as "Tremella Soup," is a traditional Chinese dessert that is cherished for its health benefits and re...